Sensitive fields, integration with Google Calendar, Microsoft Outlook, easy management of company documents
Sensitive fields, integration with Google Calendar, Microsoft Outlook, easy management of company documents
We are certain that the new year will bring us positive changes in our personal and professional lives. So let's step into 2023 with the latest updates from the PeopleForce team:
- Keeping some fields hidden from everyone who has access to candidates is really important. That’s why we added a new flexible feature called the sensitive field.
- We completely reworked Google calendar integration to work on at company level. There is no need for everyone in the company to integrate separately. Integration with Google calendar has become much easier, with just one click and it's all up and running.
- We are happy to introduce Microsoft calendar integration so you never lose your PeopleForce events.
- Take advantage of the competency filter for the Review cycle which allows you to get a complete overview of employee ratings for each competency.
- Generate documents from templates with merged fields, and automate this process with workflows.
- All documents at the company level are gathered in the Documents tab. Using the flexible filters, you can quickly find the document from a certain folder or an employee.
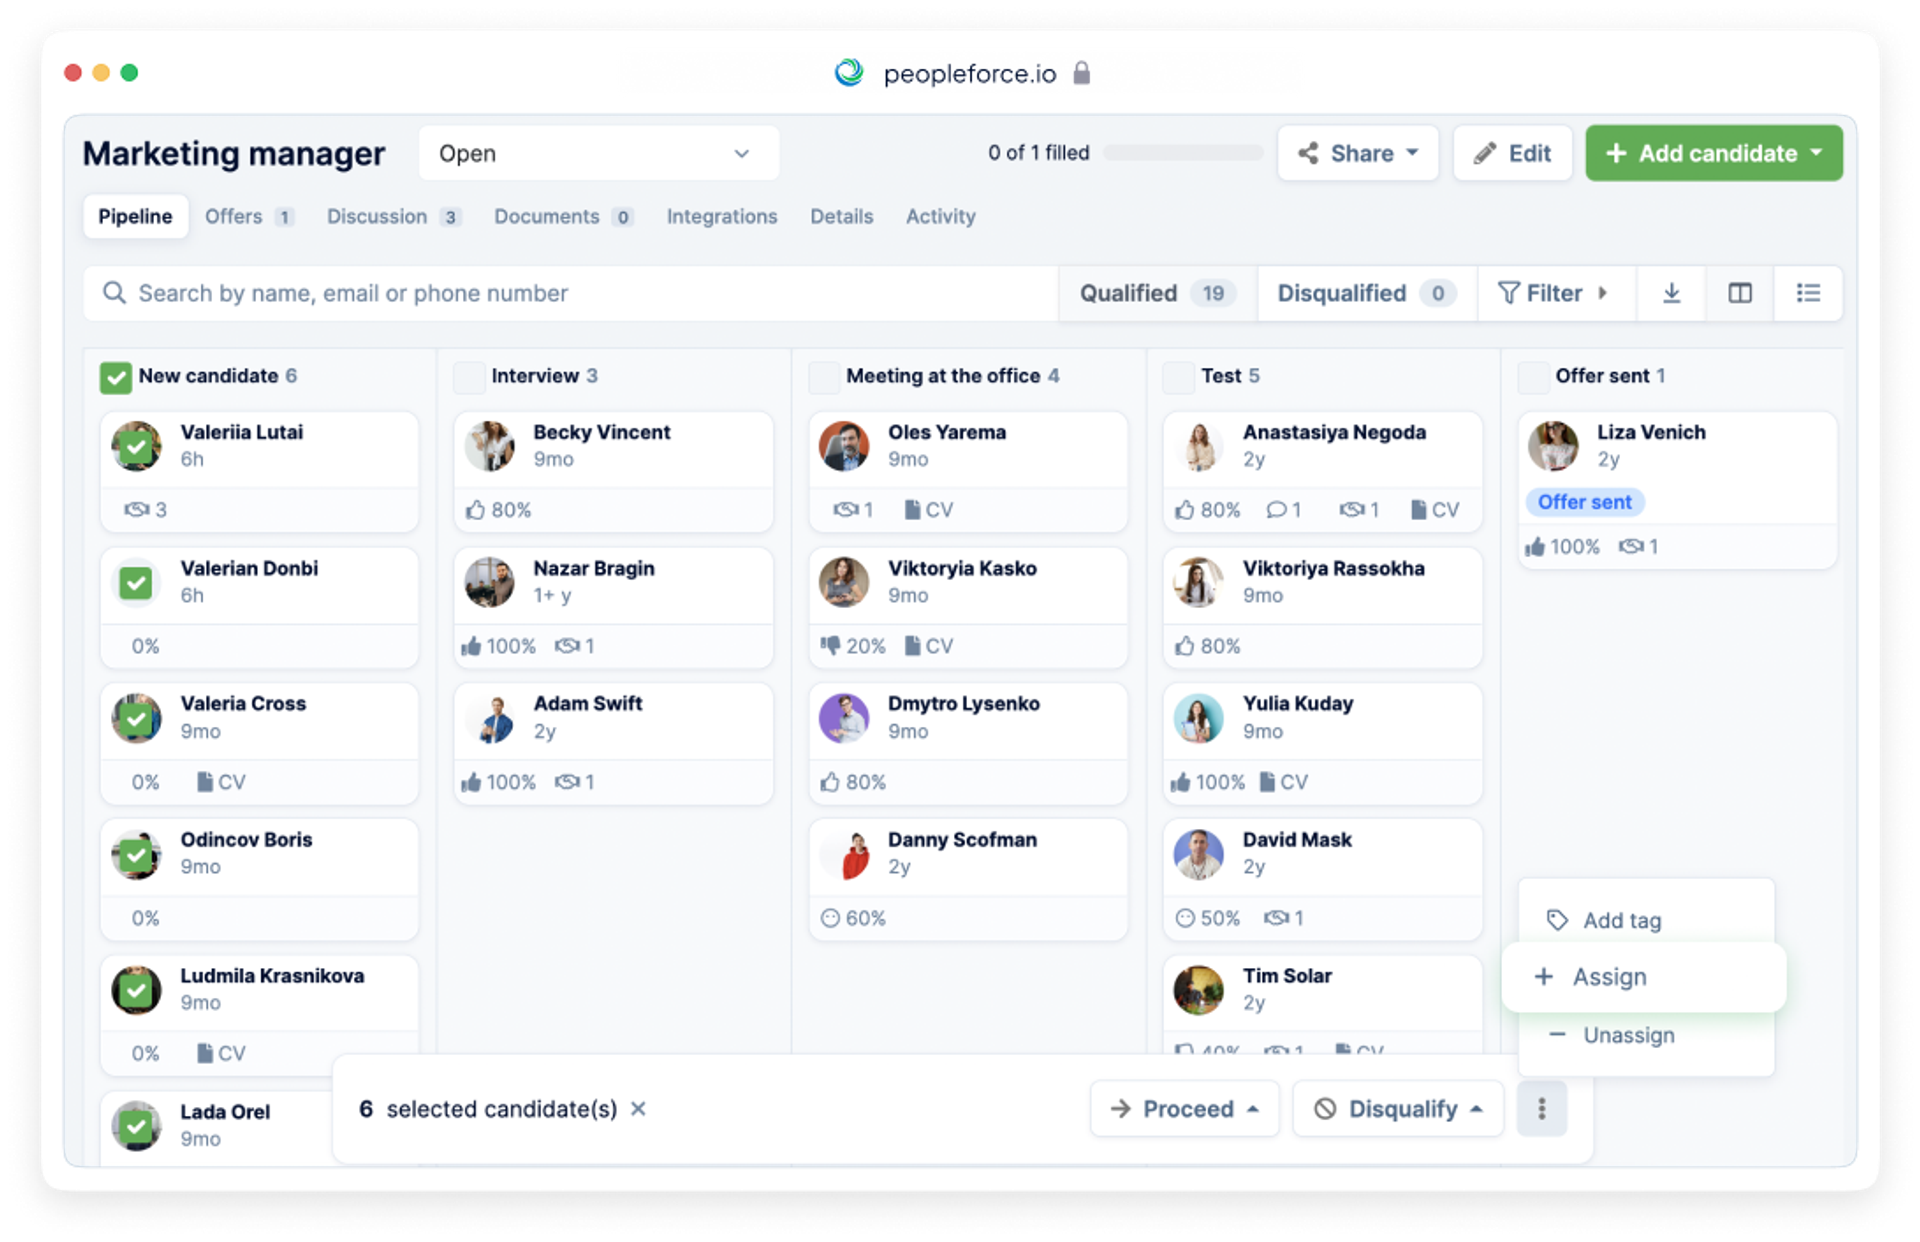
- Bulk actions for tags will allow you to quickly mark candidates by a certain criteria, which will greatly simplify the recruiter's work in analyzing future candidates.
- Bulk actions for assigning candidates to an open vacancy. Now you can assign the candidates from previously created vacancies to the new open one.
Sensitive fields
We understand how important it is to keep information about candidates available only to some vacancy participants.
To help with this we added a new flexible feature called "sensitive fields". Now you can hide custom fields about the candidate's salary expectations, current job, etc.
Let's take a closer look at how this works.
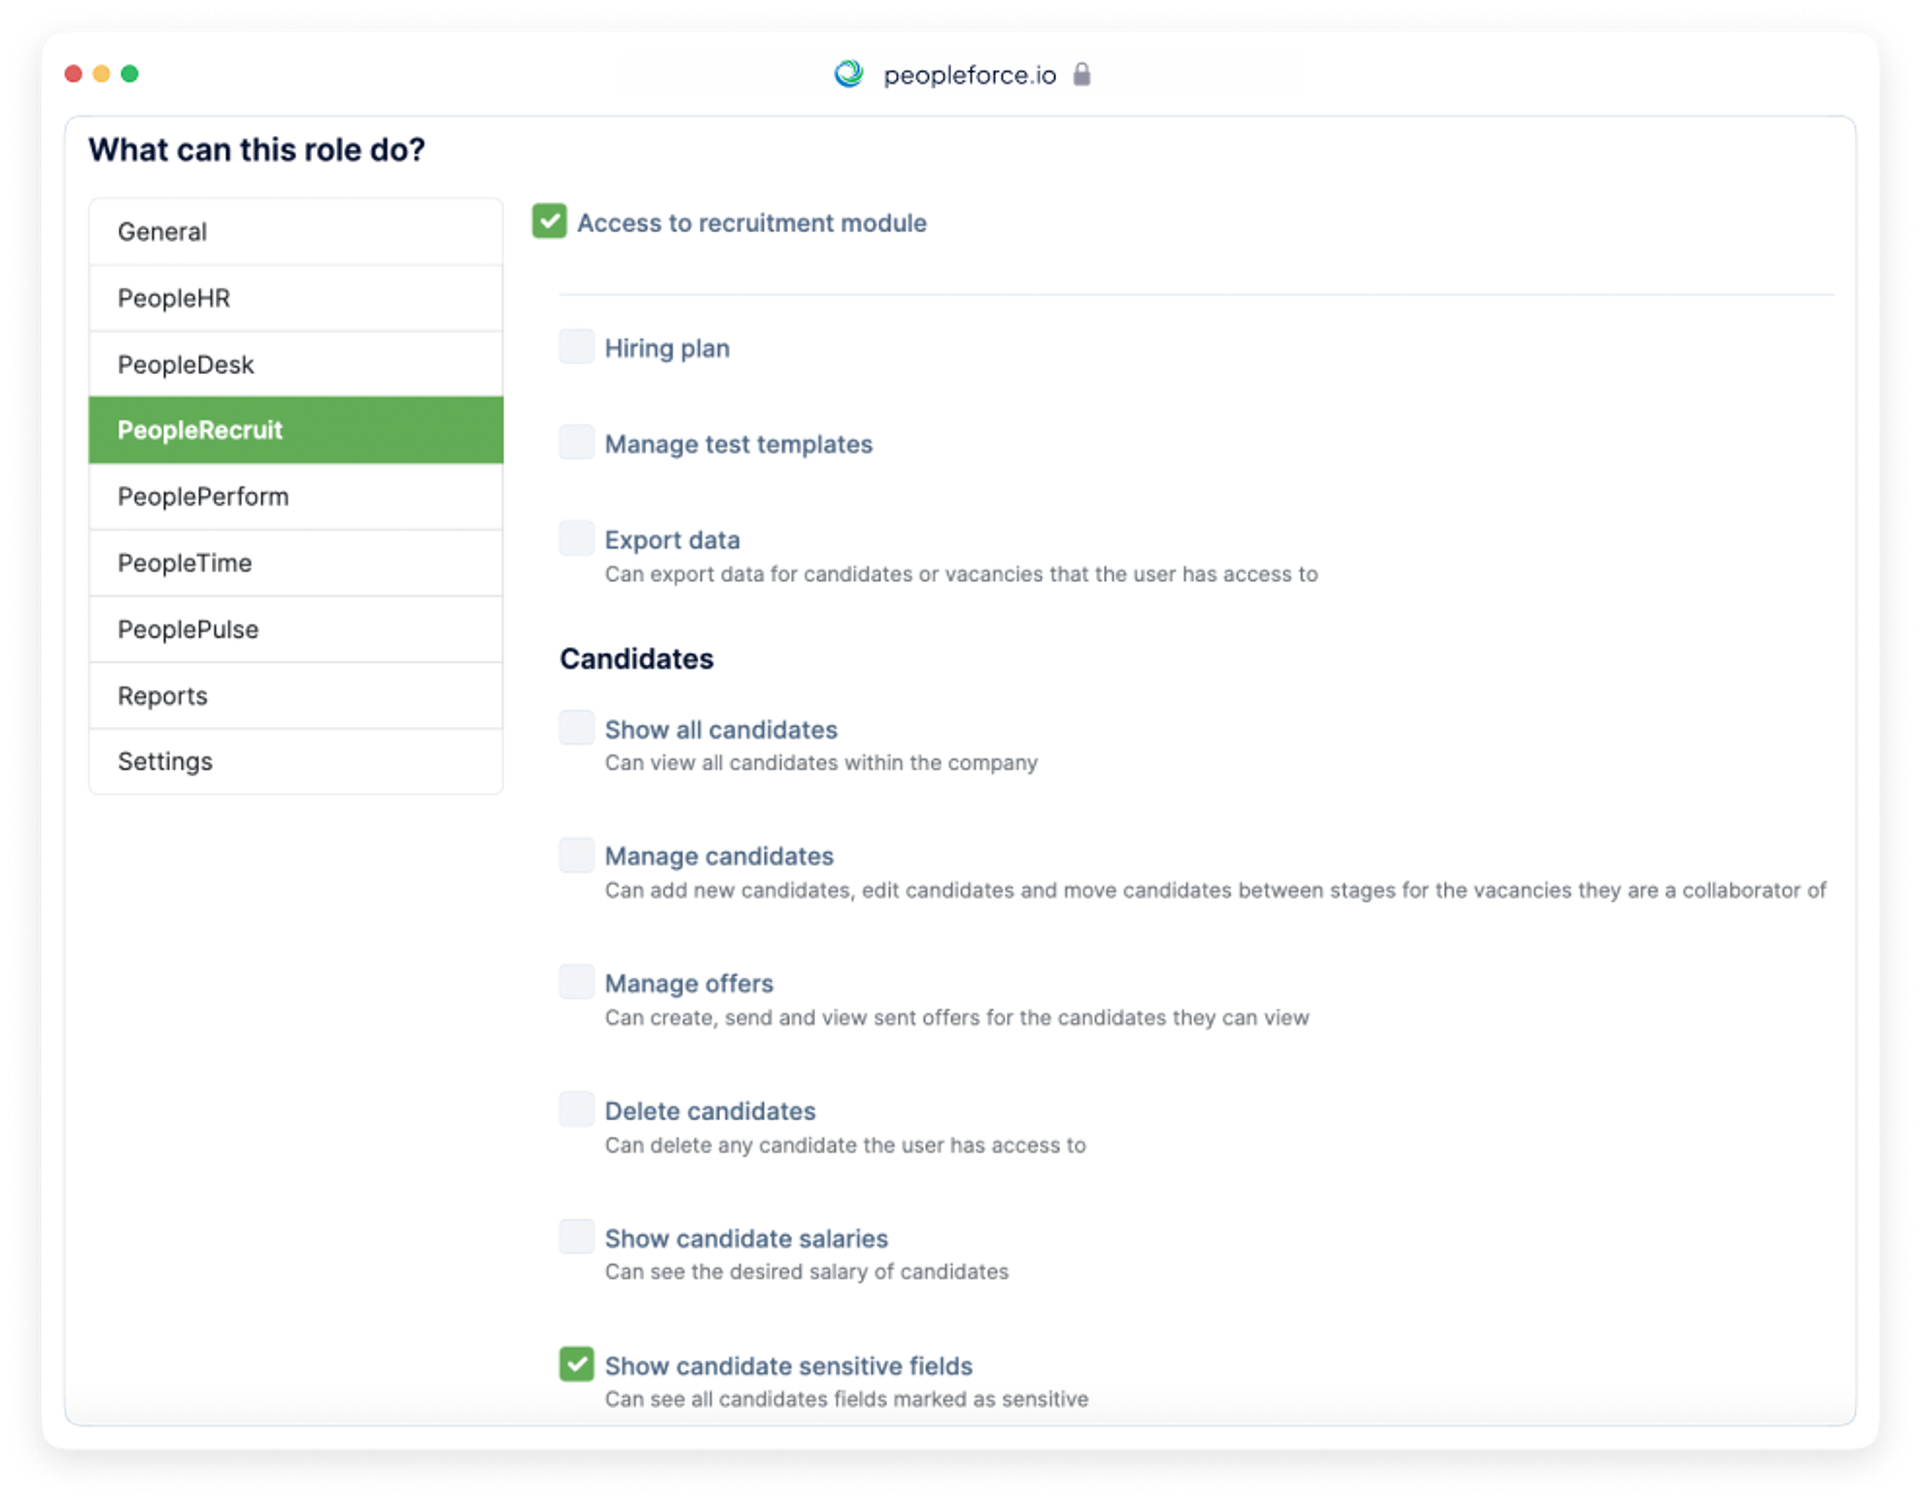
In Roles & Permissions, enable the sensitive fields for a specific role. Only the participants of this role can see all the candidates fields marked as sensitive.
Then in the candidates fields, mark the custom fields you want to hide from other participants of the hiring process.
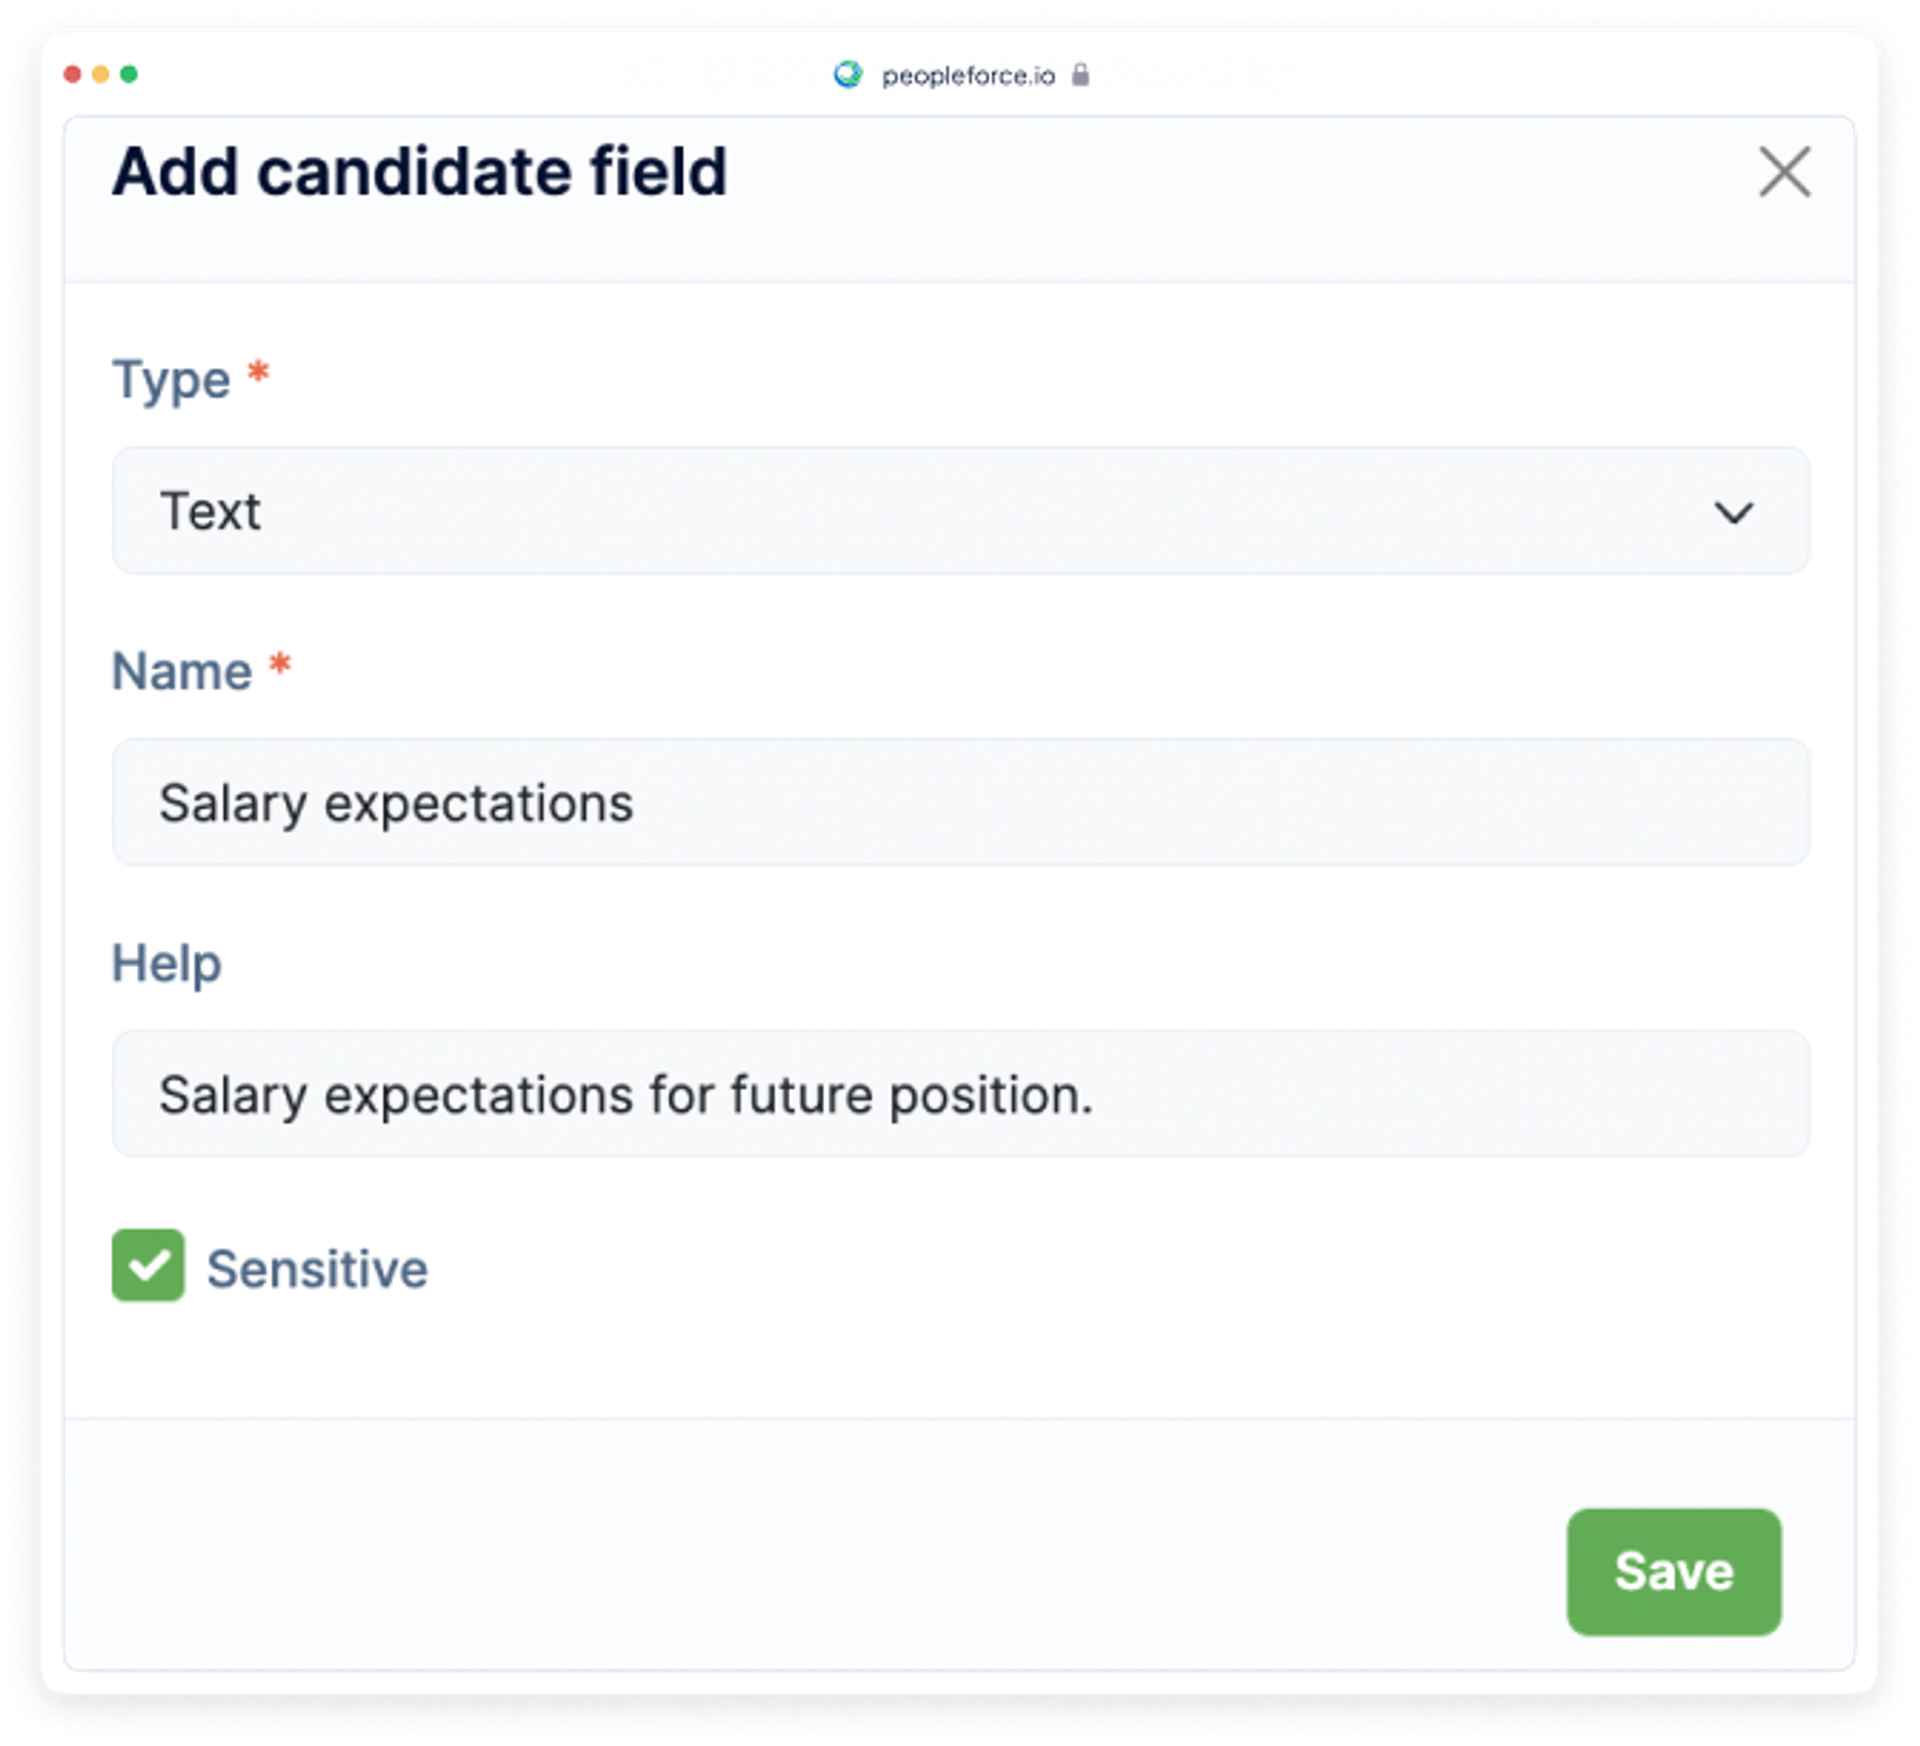
You can mark sensitive new custom fields as well as existing ones. Feel free to create your new sensitive fields in any of the types we provide for candidate custom fields.
New integration with Google Calendar
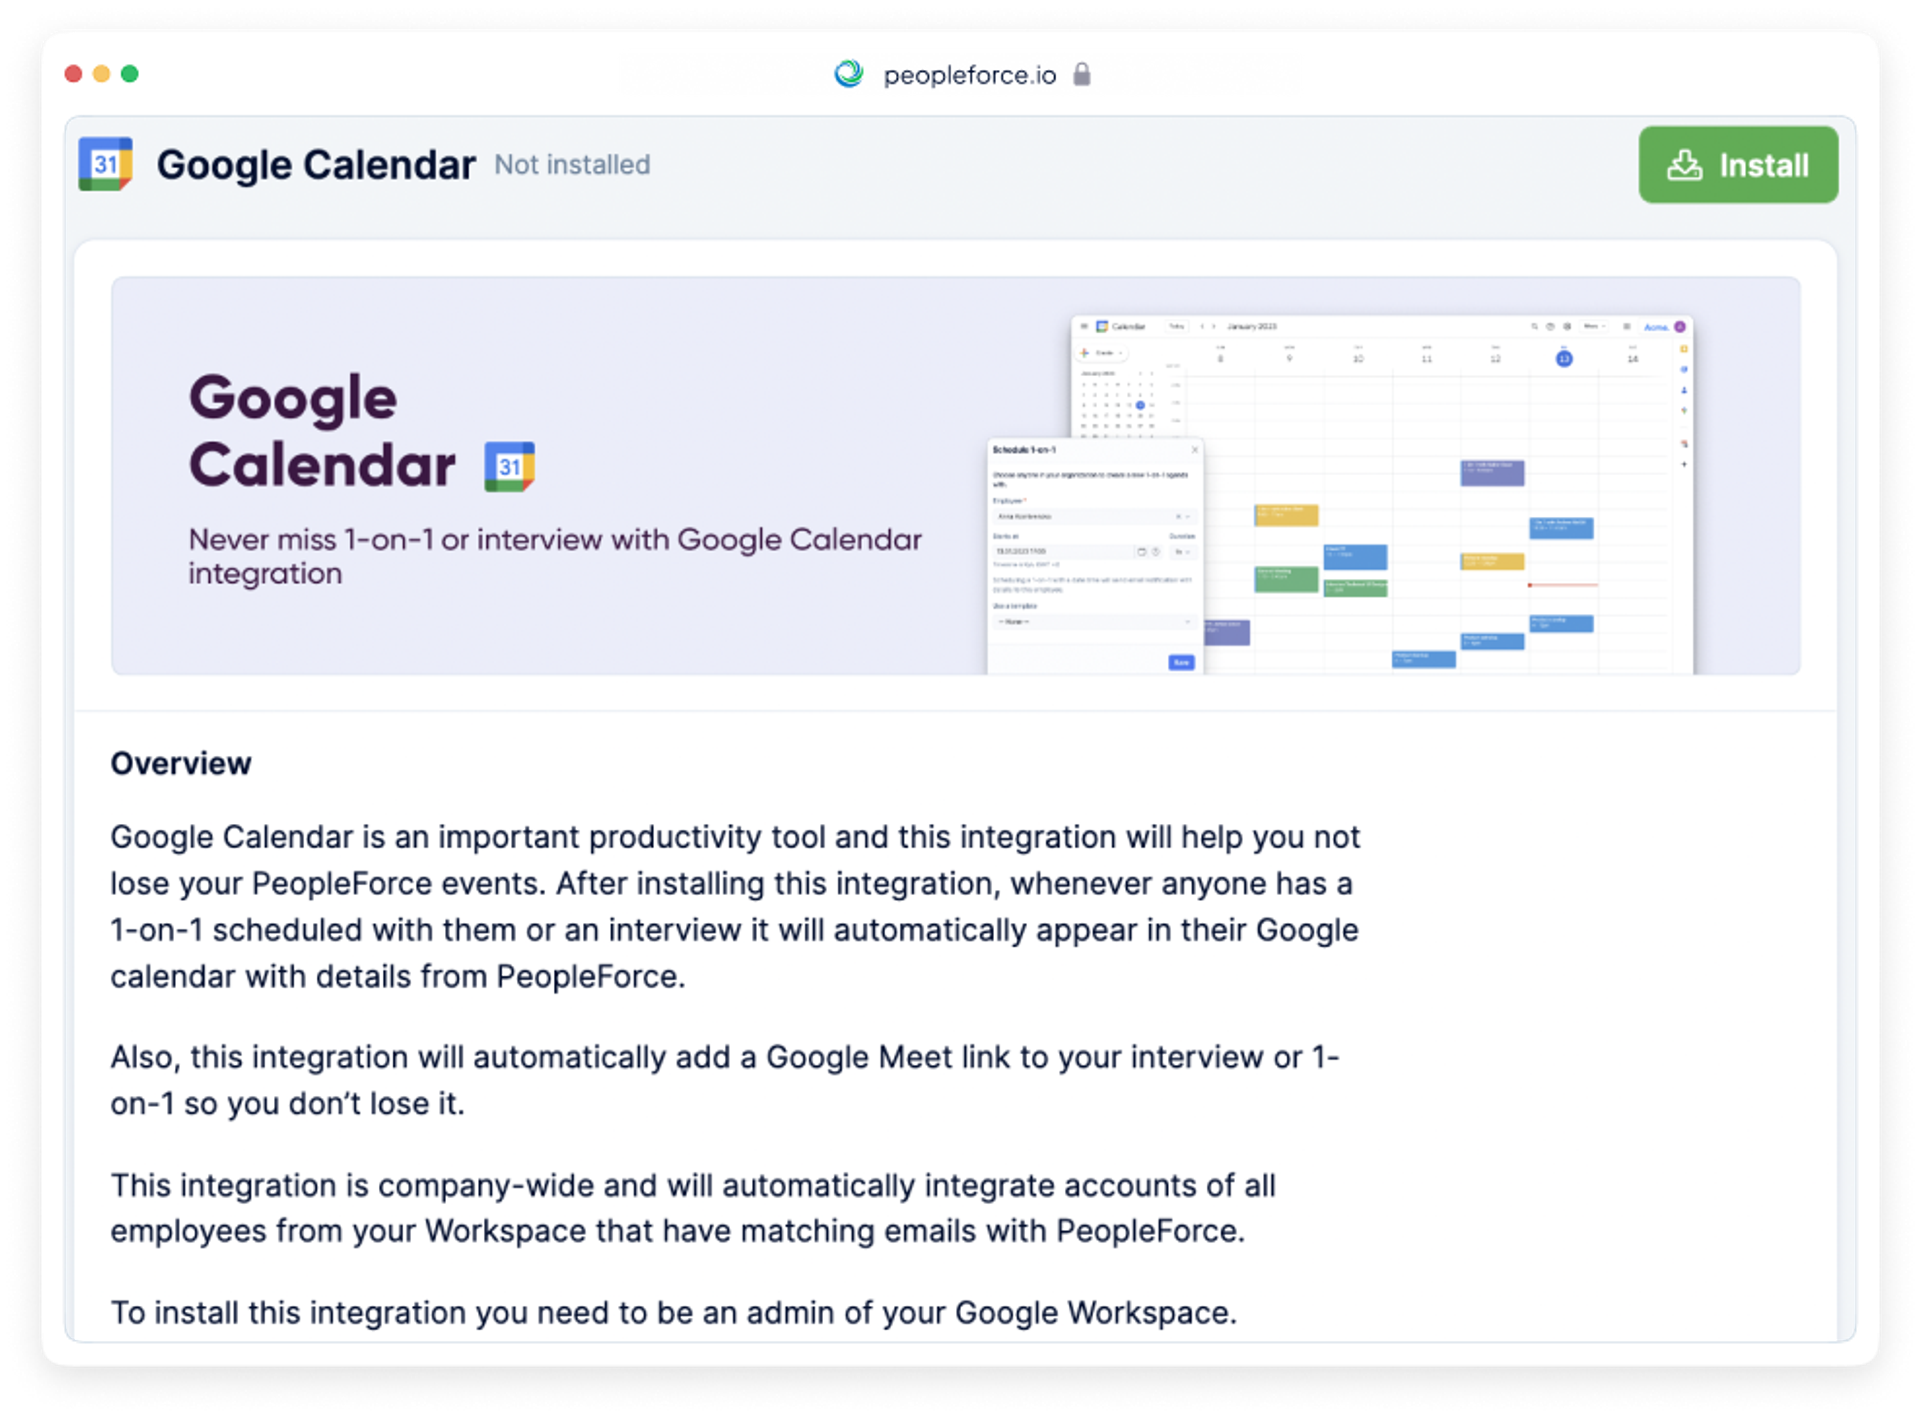
This time we completely reworked Google Calendar integration to work at the company level. Now admins can integrate the calendars of everyone in the company with a couple of simple clicks. If the employee's work email matches the company domain, the person is integrated automatically. This means that Google Meet integration links and events will be automatically pushed into calendars instead of asking every employee to integrate.
Integration with Microsoft calendar
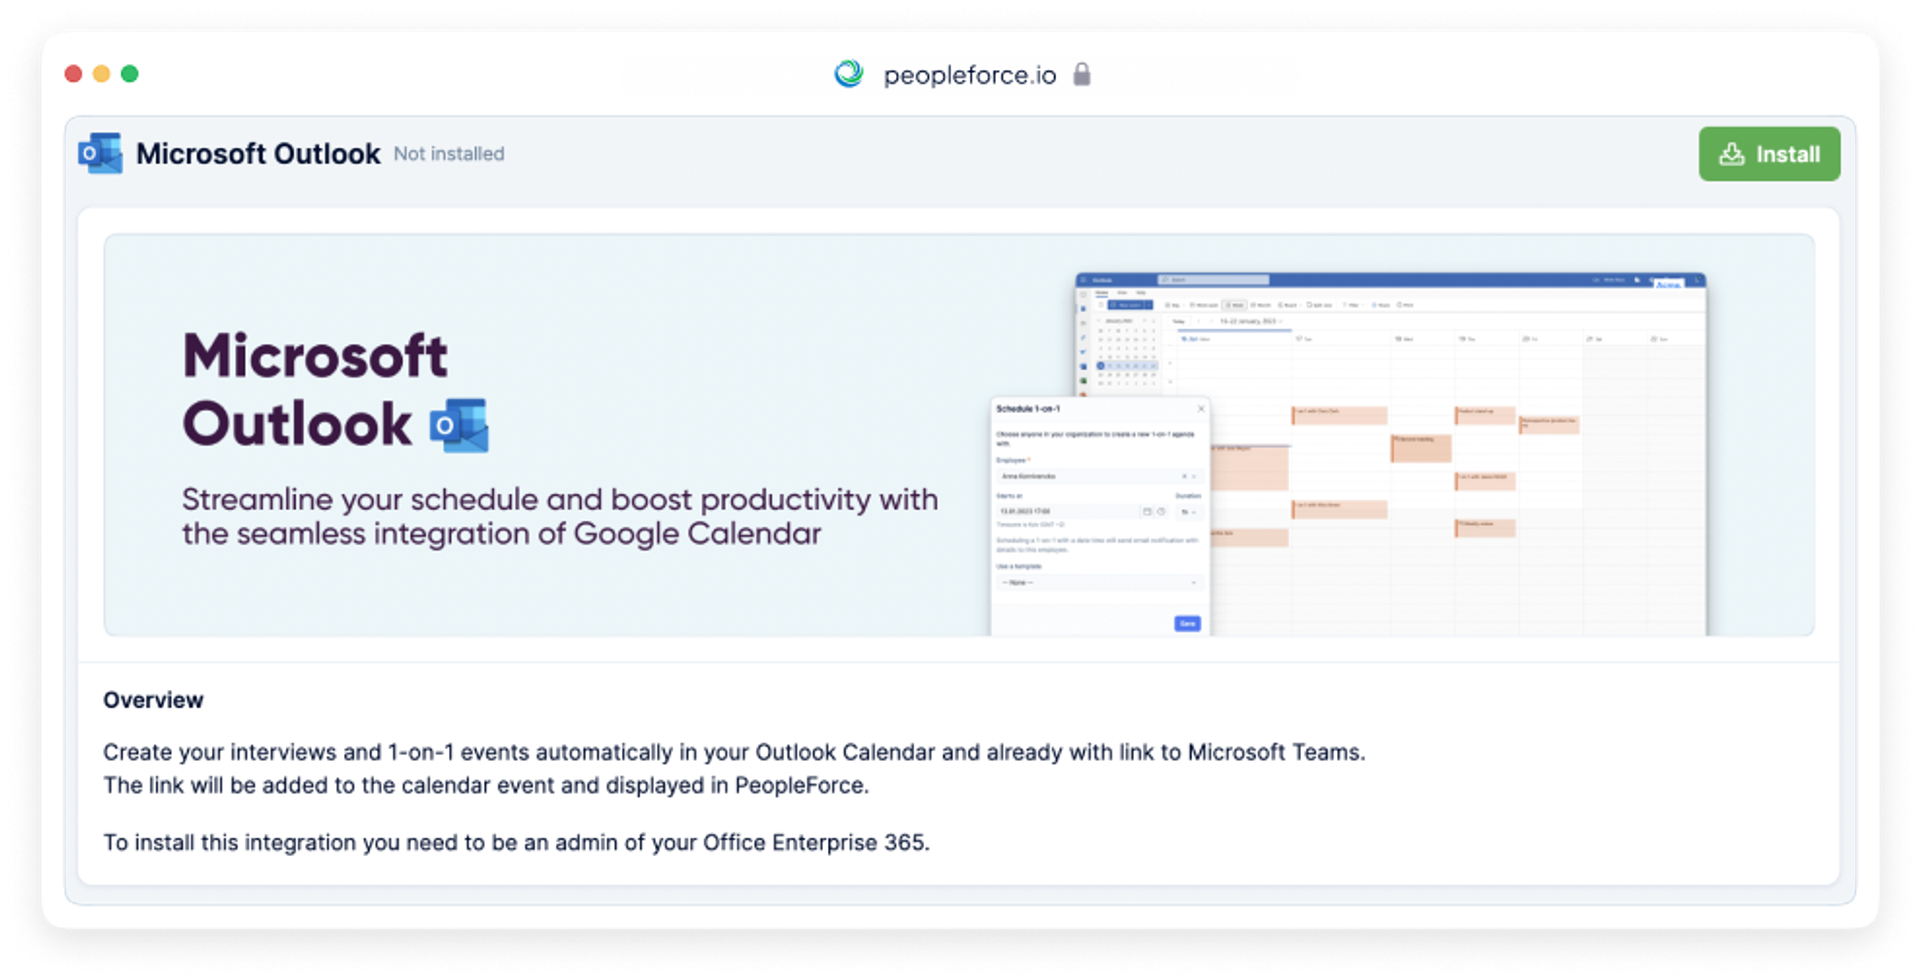
Great news for all our users of Microsoft 365! We are happy to introduce Microsoft calendar integration so you never lose your PeopleForce events. It’s very simple to set it up with just a couple of clicks on our newly redesigned integrations page. PeopleForce will automatically synchronize employee interviews, 1-on-1s, calendar events and non-working leave requests such as vacations, sick leaves etc with their calendars.
Added competency filter for the review cycle
This time we've added a competency filter which allows you to get a complete overview of employee ratings for each competency.
For example, say you want to know who in your company has the highest rating in the competency Motivation in the Finance department. Select the competency and other indicators you are interested in and enjoy the results, ranging from the highest to the lowest rating.
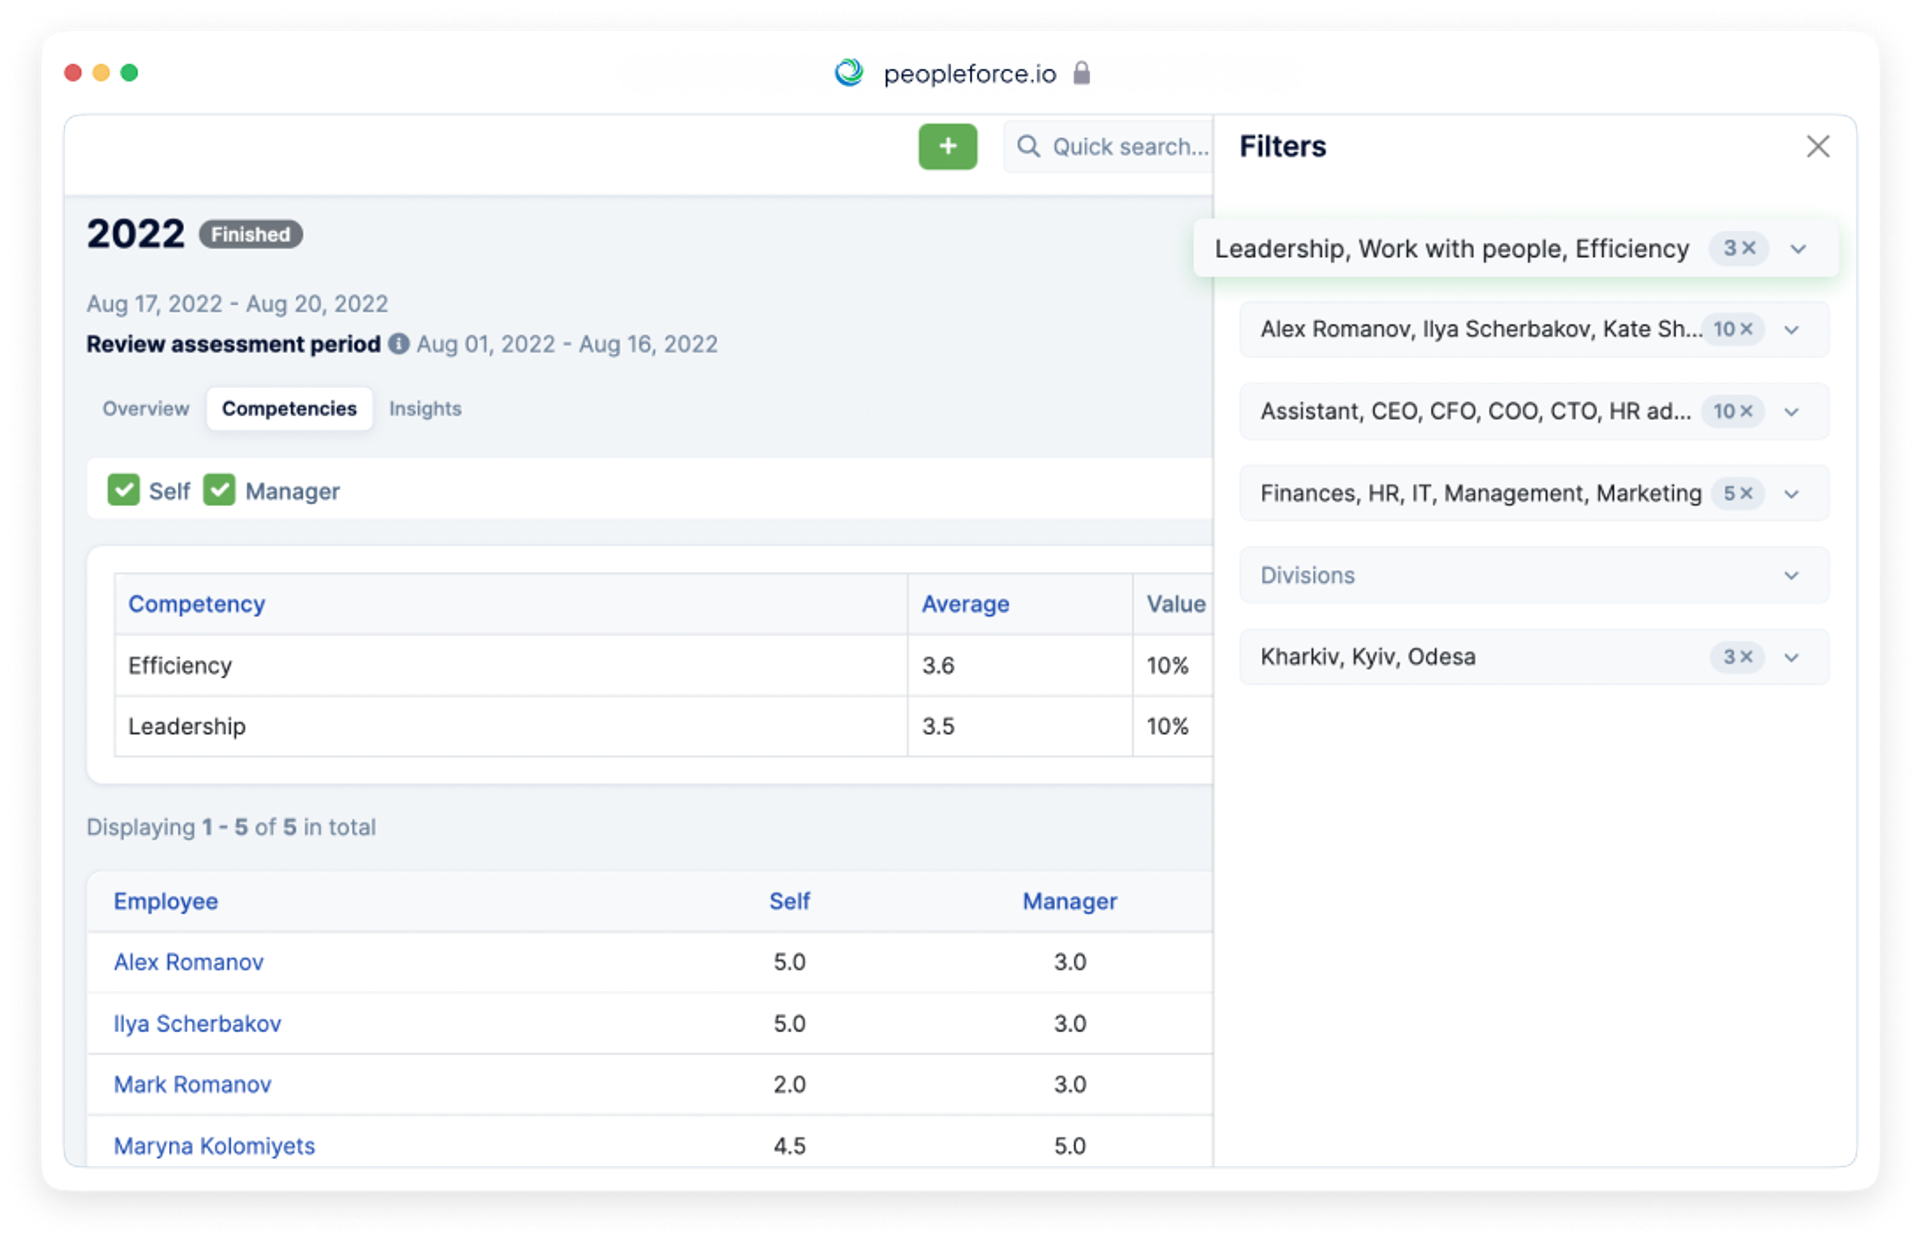
See your internal employee ratings to monitor the best employees in each of the competencies.
Automated employee’s documents templates
Now you can generate all necessary documents from templates with a few clicks. Using the merge while creating the templates, you can easily generate the documents in the employee profile.
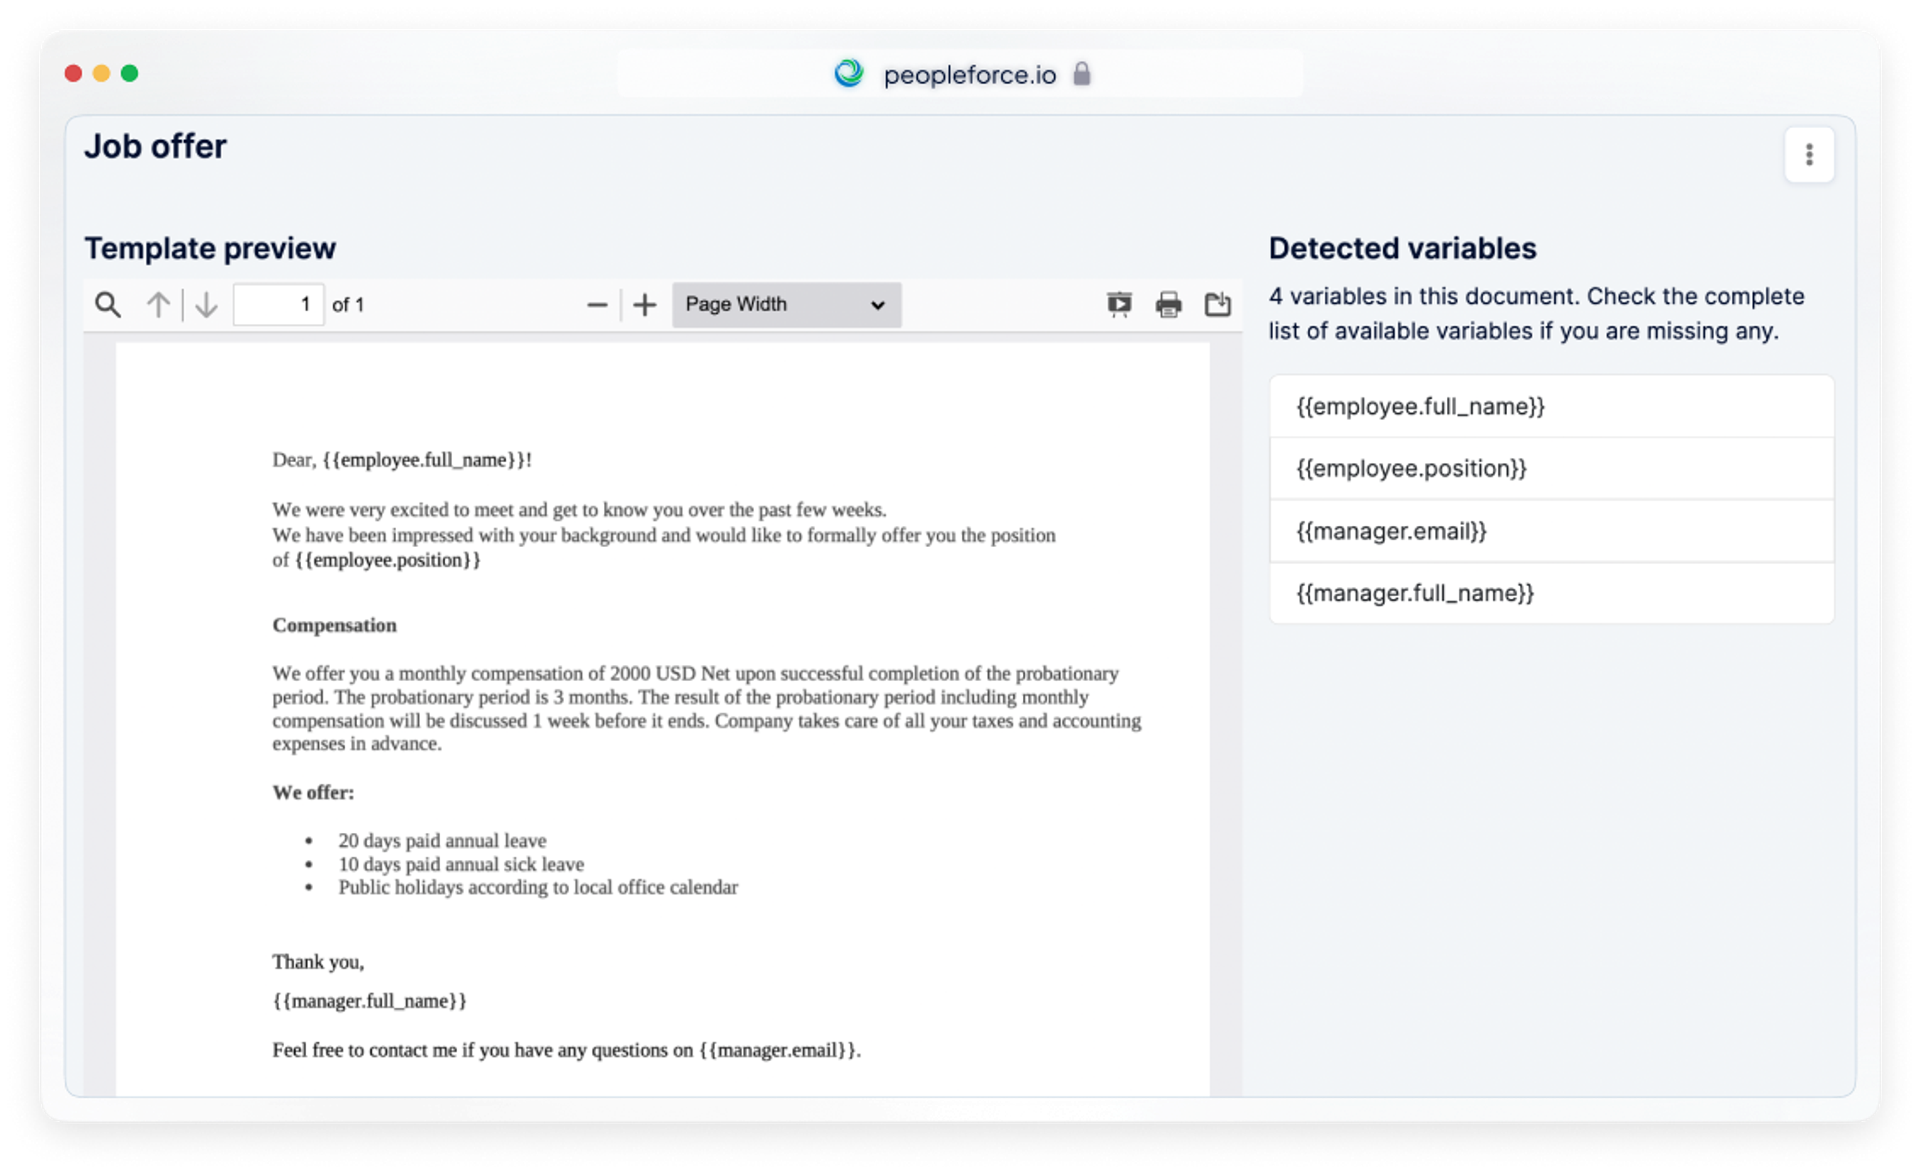
To see how it works, let's generate a job offer for an employee from the document template. In the action menu, click on the "Generate from template" option. Select a folder and a document template from the drop-down menu. In a few seconds, a .docx file will appear in the document folder and will be merged with the employee's fields.
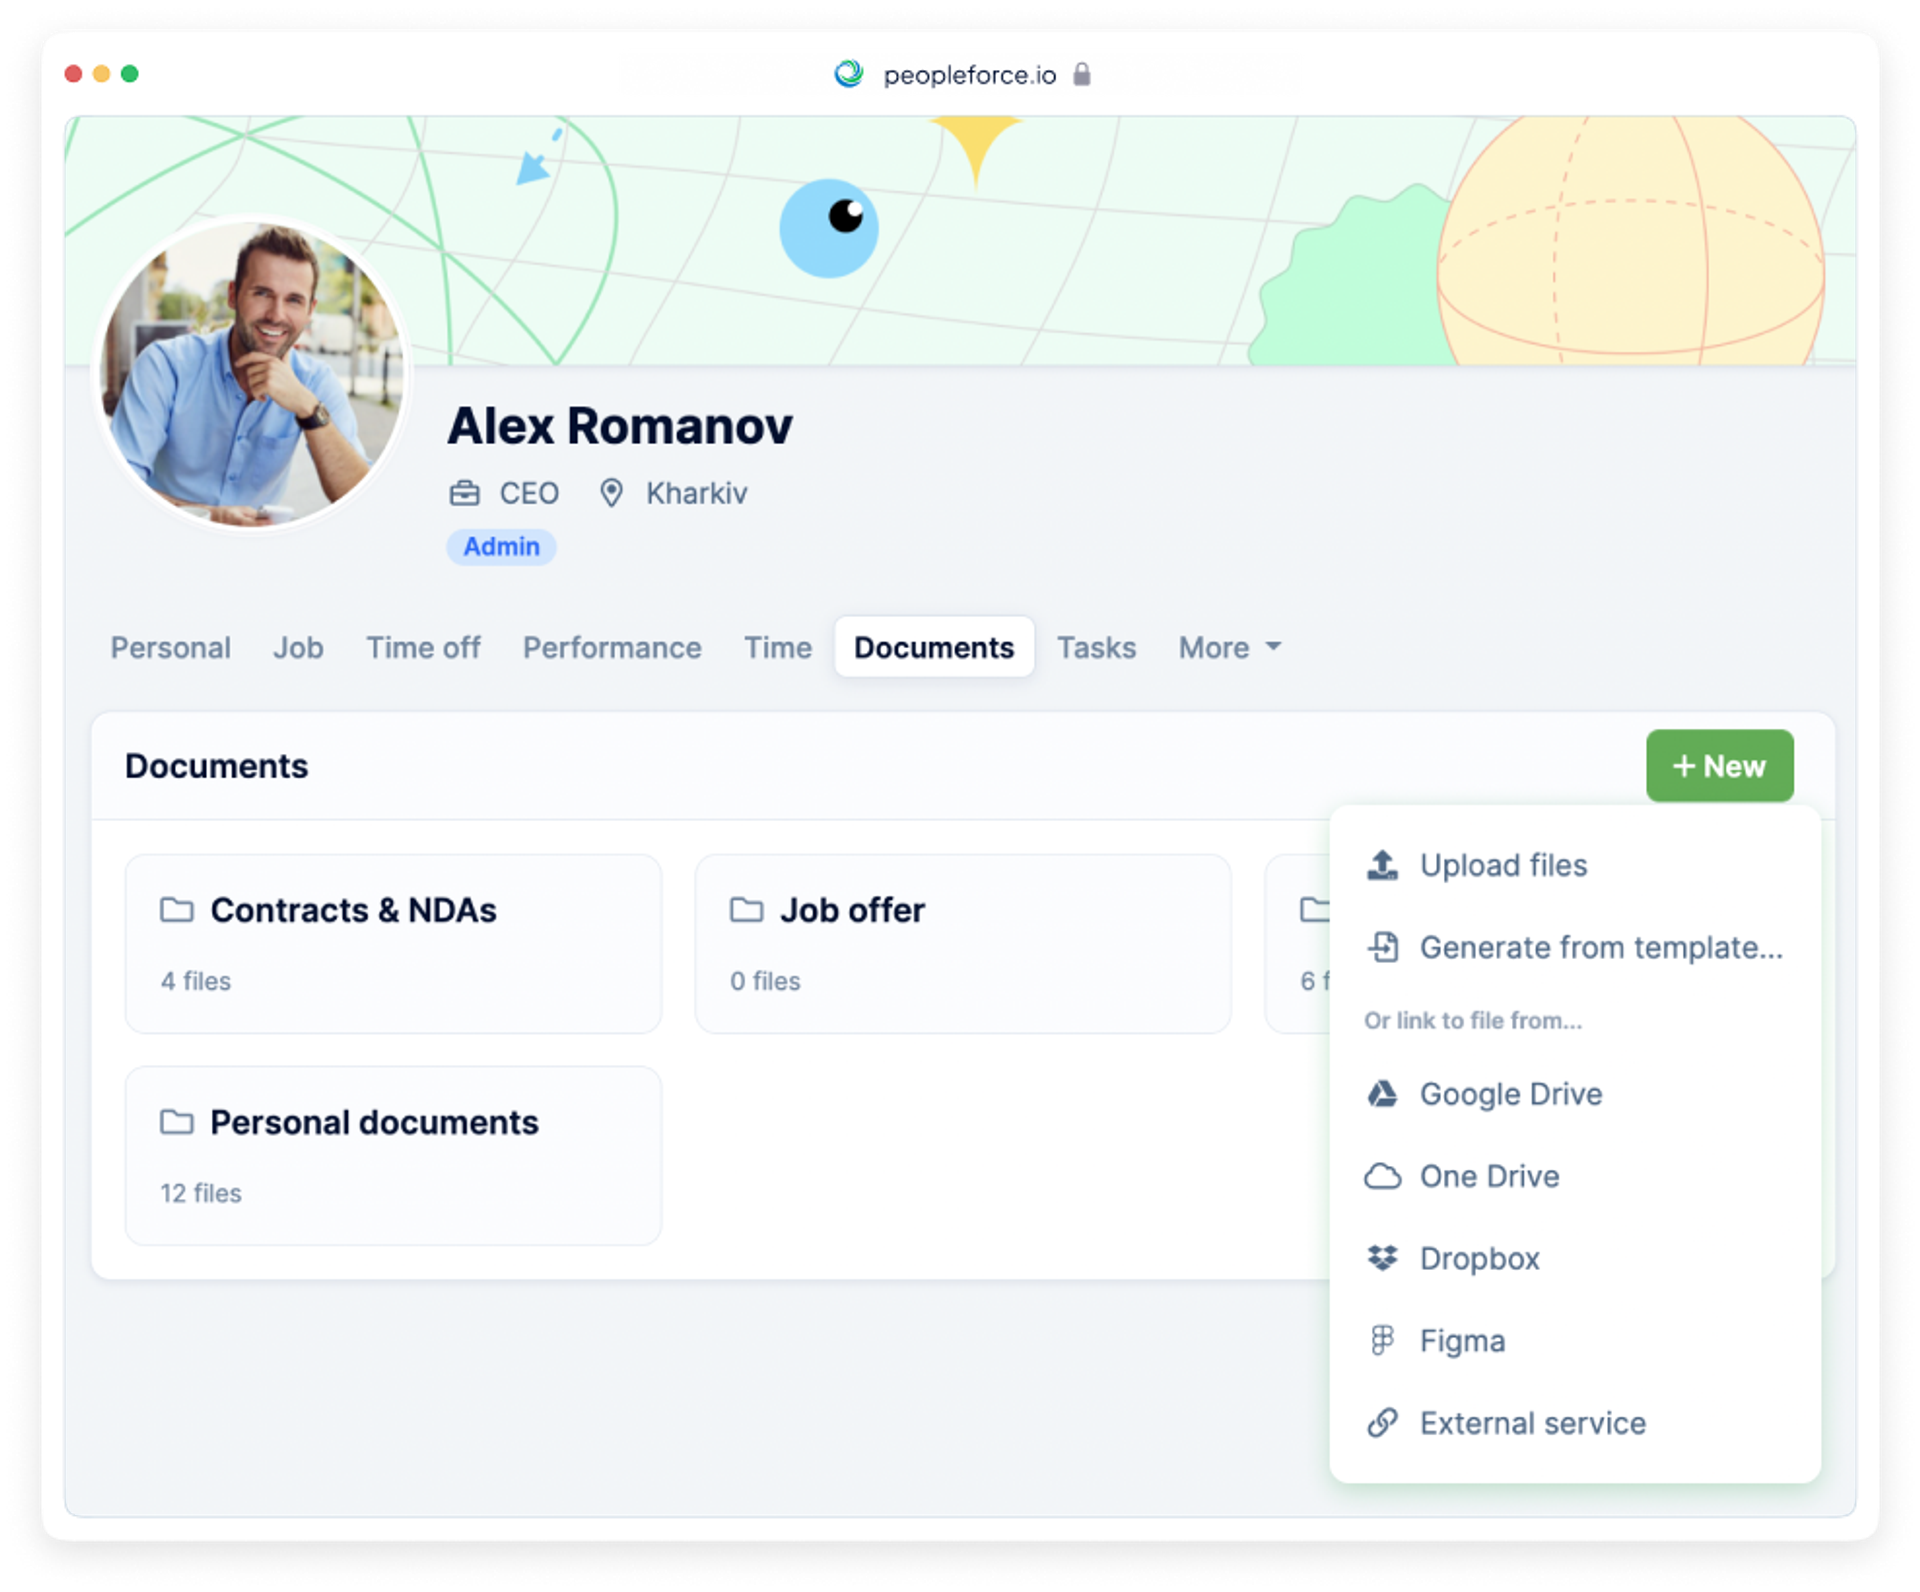
The real magic begins when we start to automate the document generating process. Create a new workflow and set up the action for generating document automation by choosing Document in the action menu.
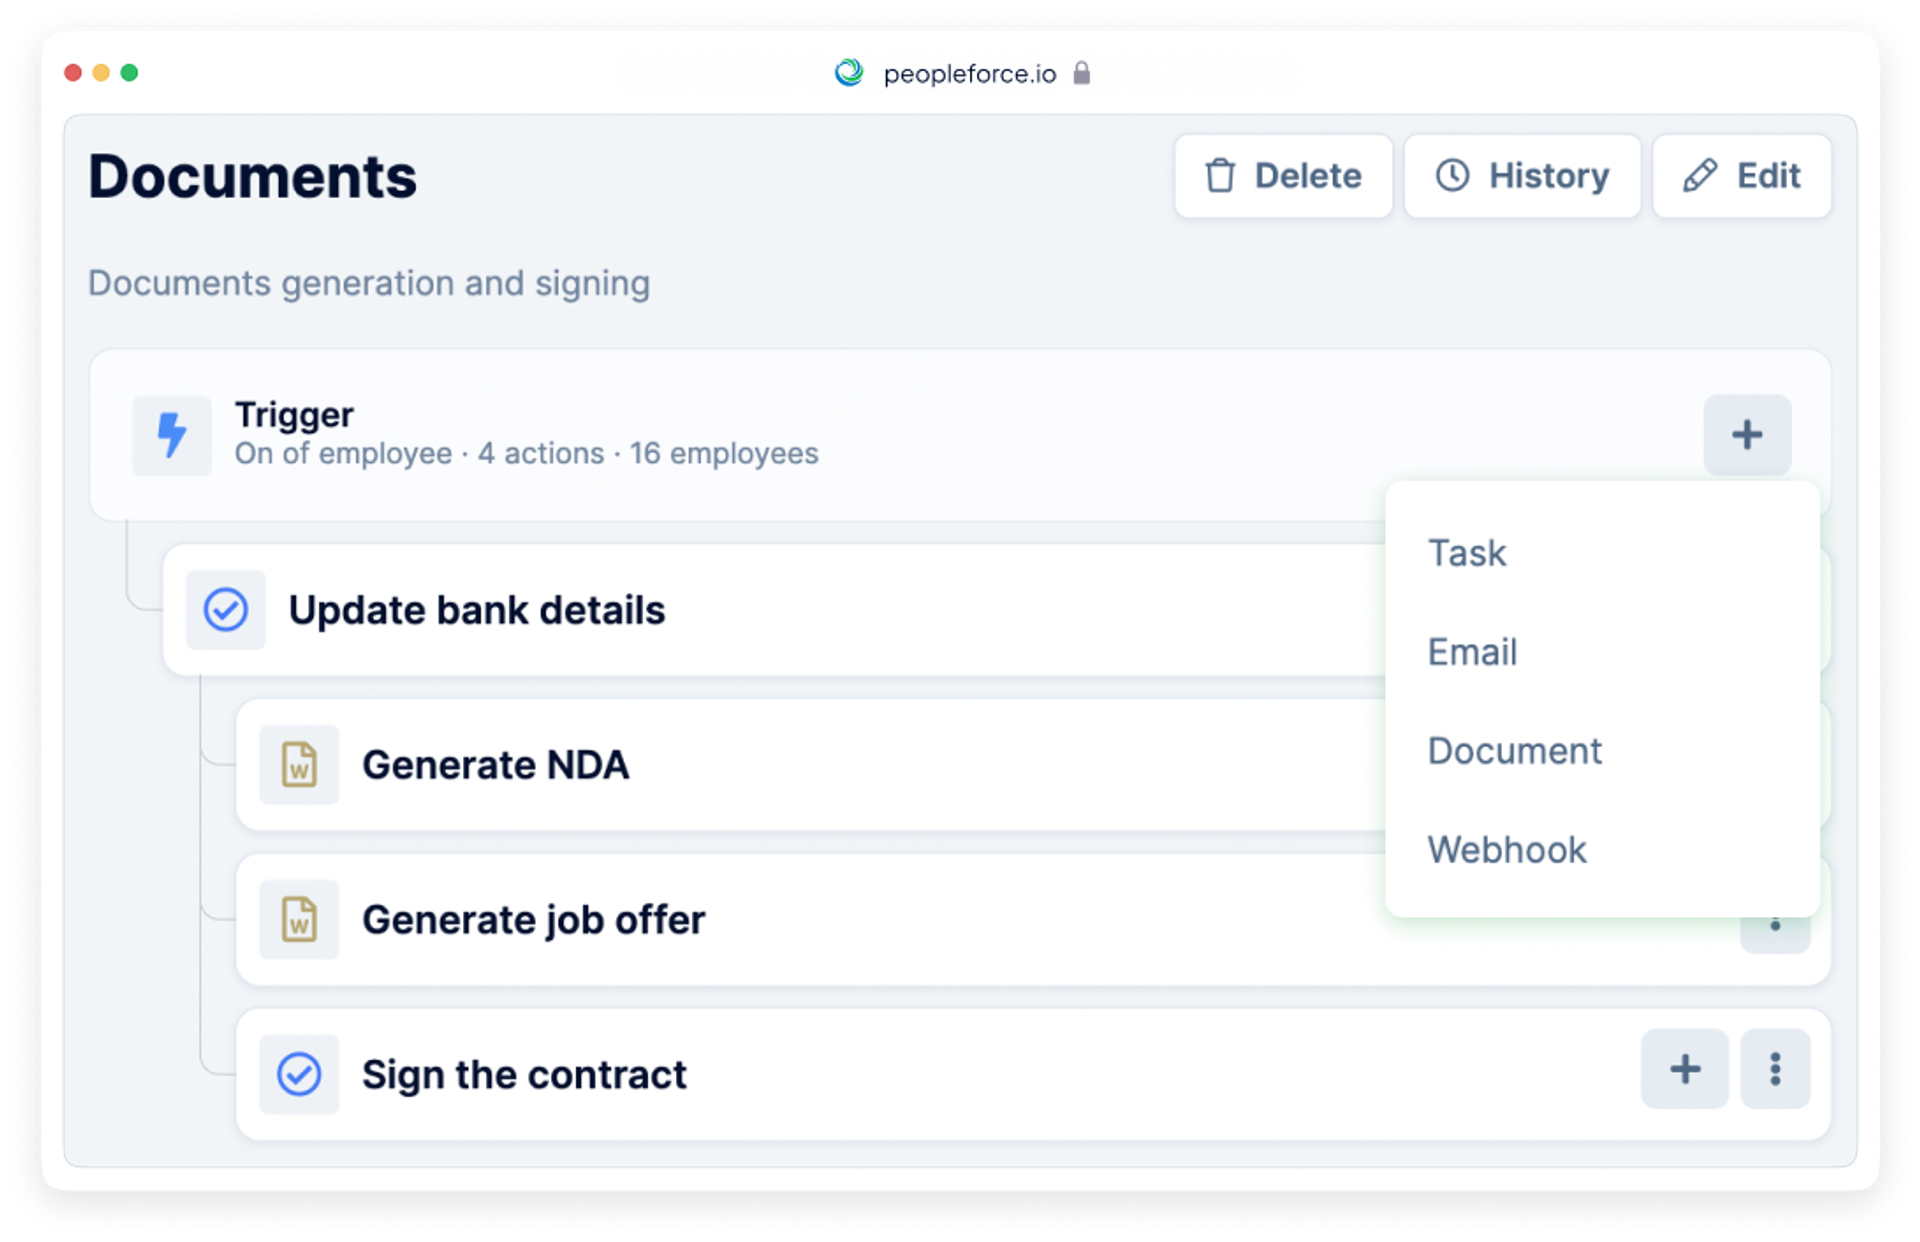
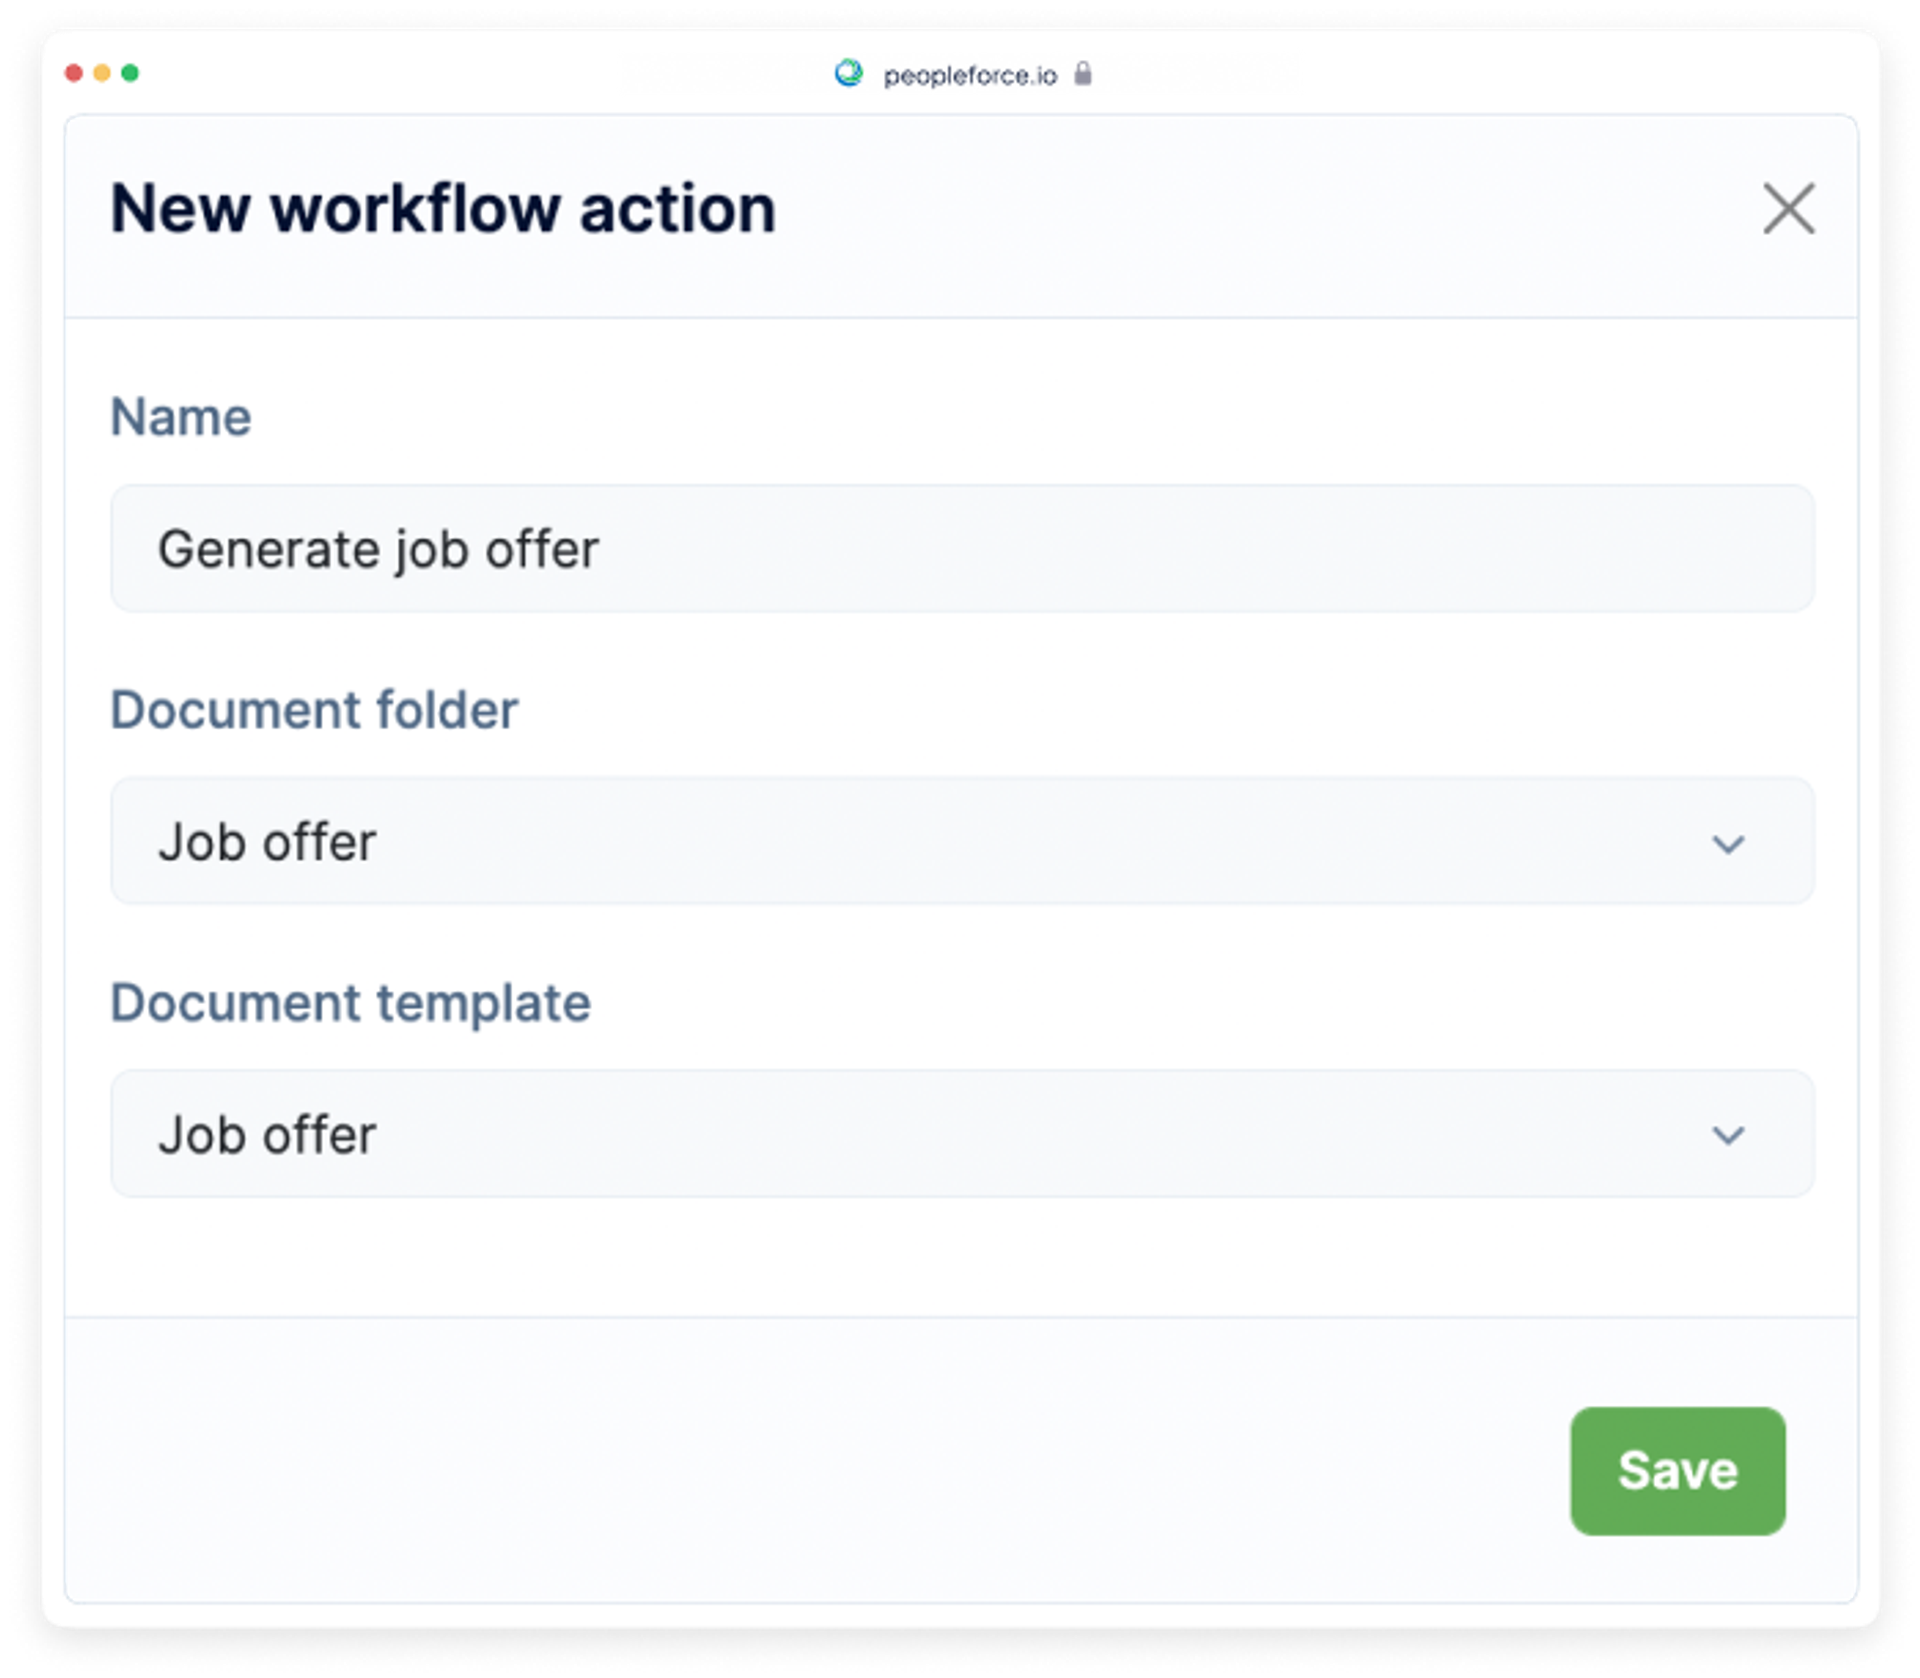
For this type of workflow action we just need to enter the name, choose the document template and a document folder from the drop-down menu.
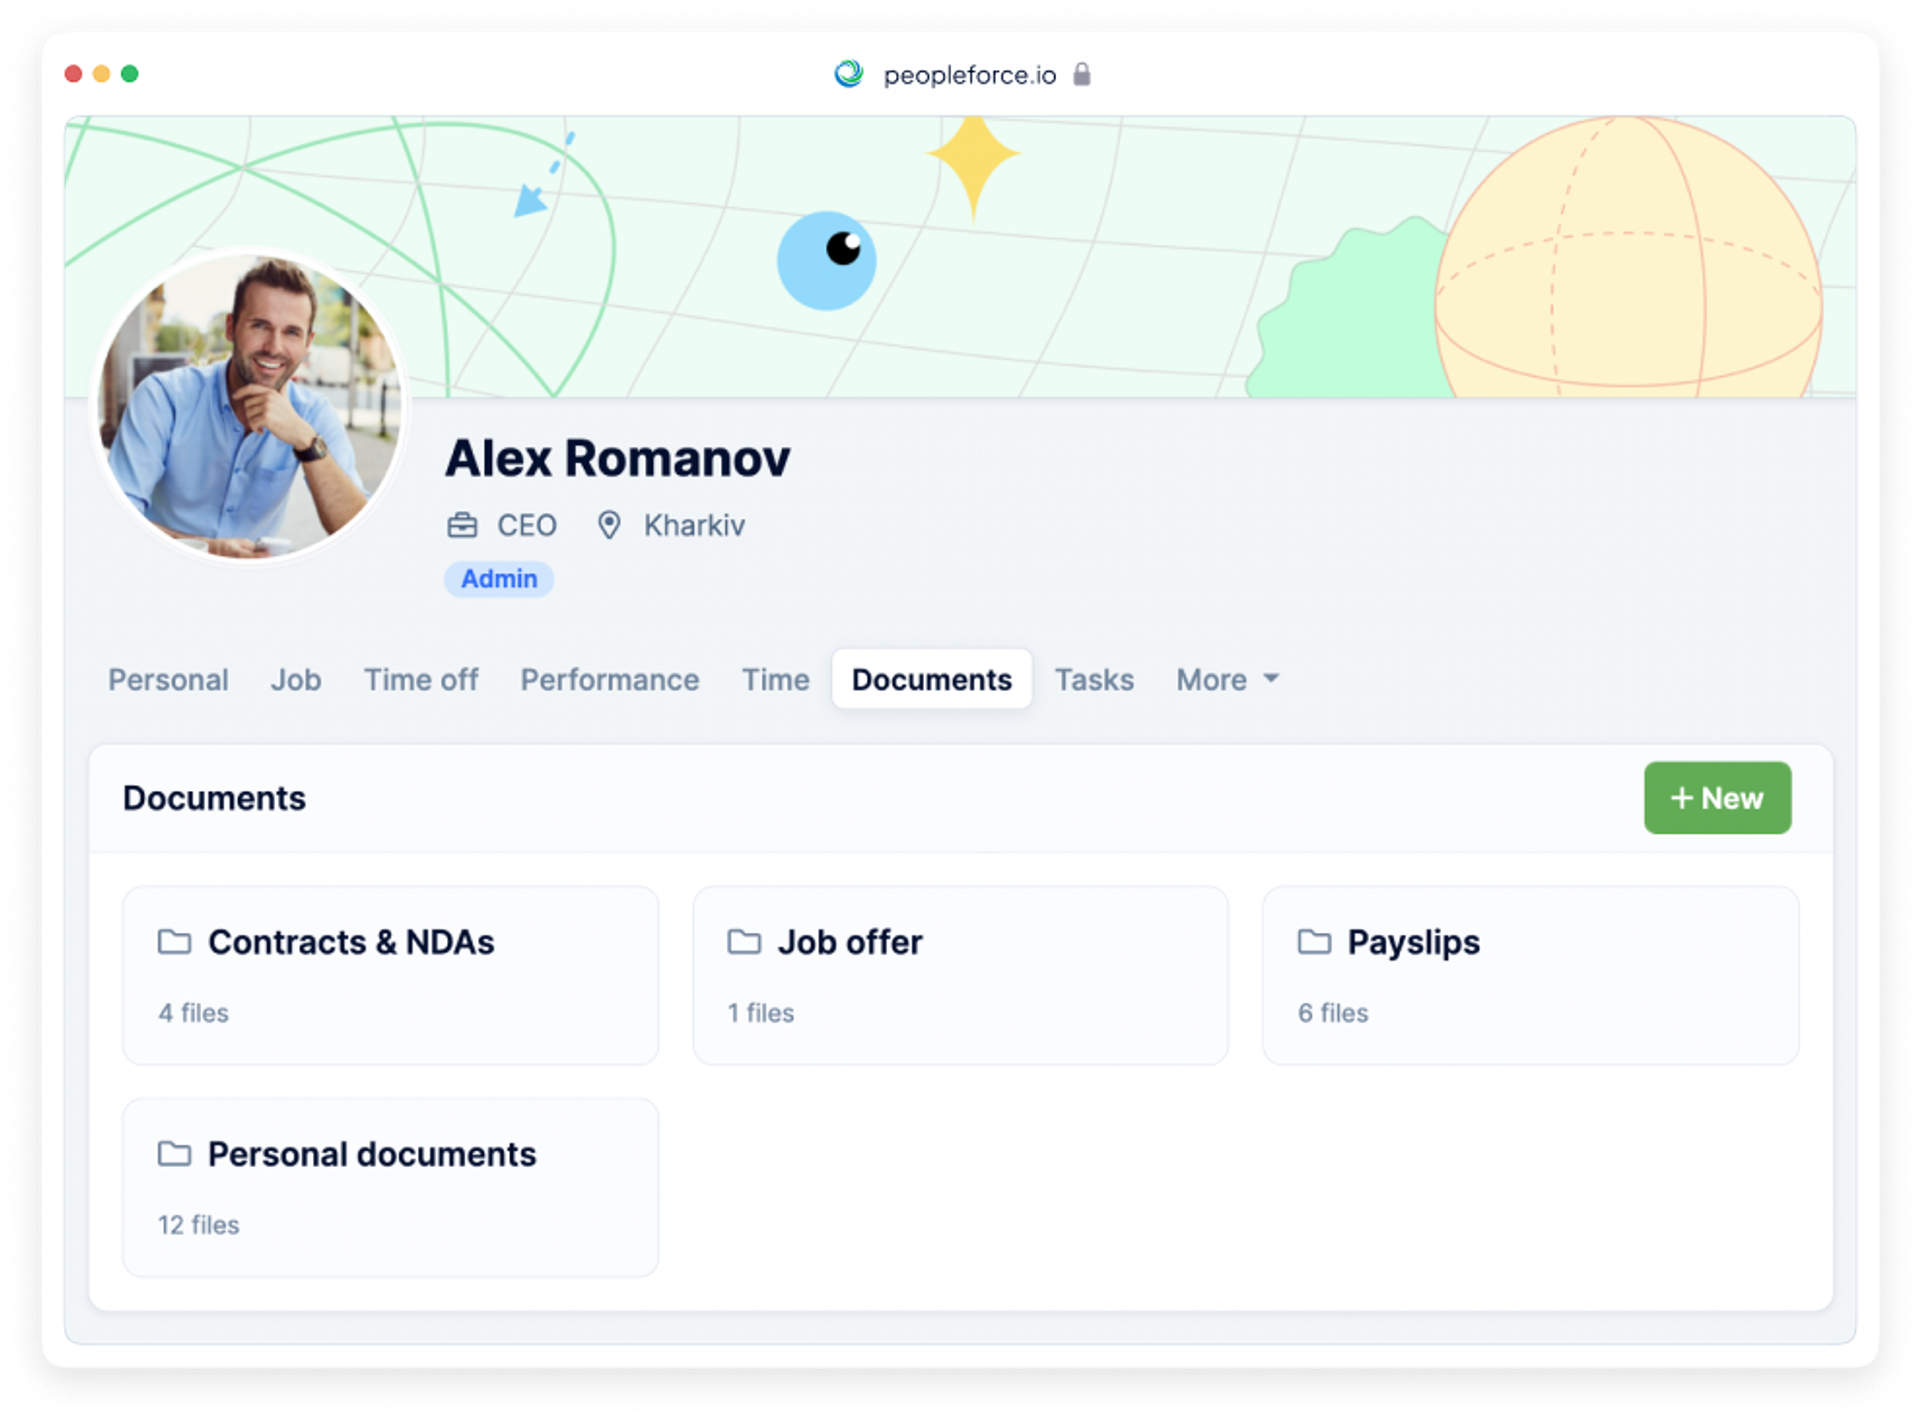
After assigning this workflow to a newcomer all the documents will be automatically generated in the folders of the Documents tab of the employee profile.
Automate all the important processes in your company with the help of workflows that are now available to all HR users. To read the article about workflows please follow the link.
Easy management of company documents
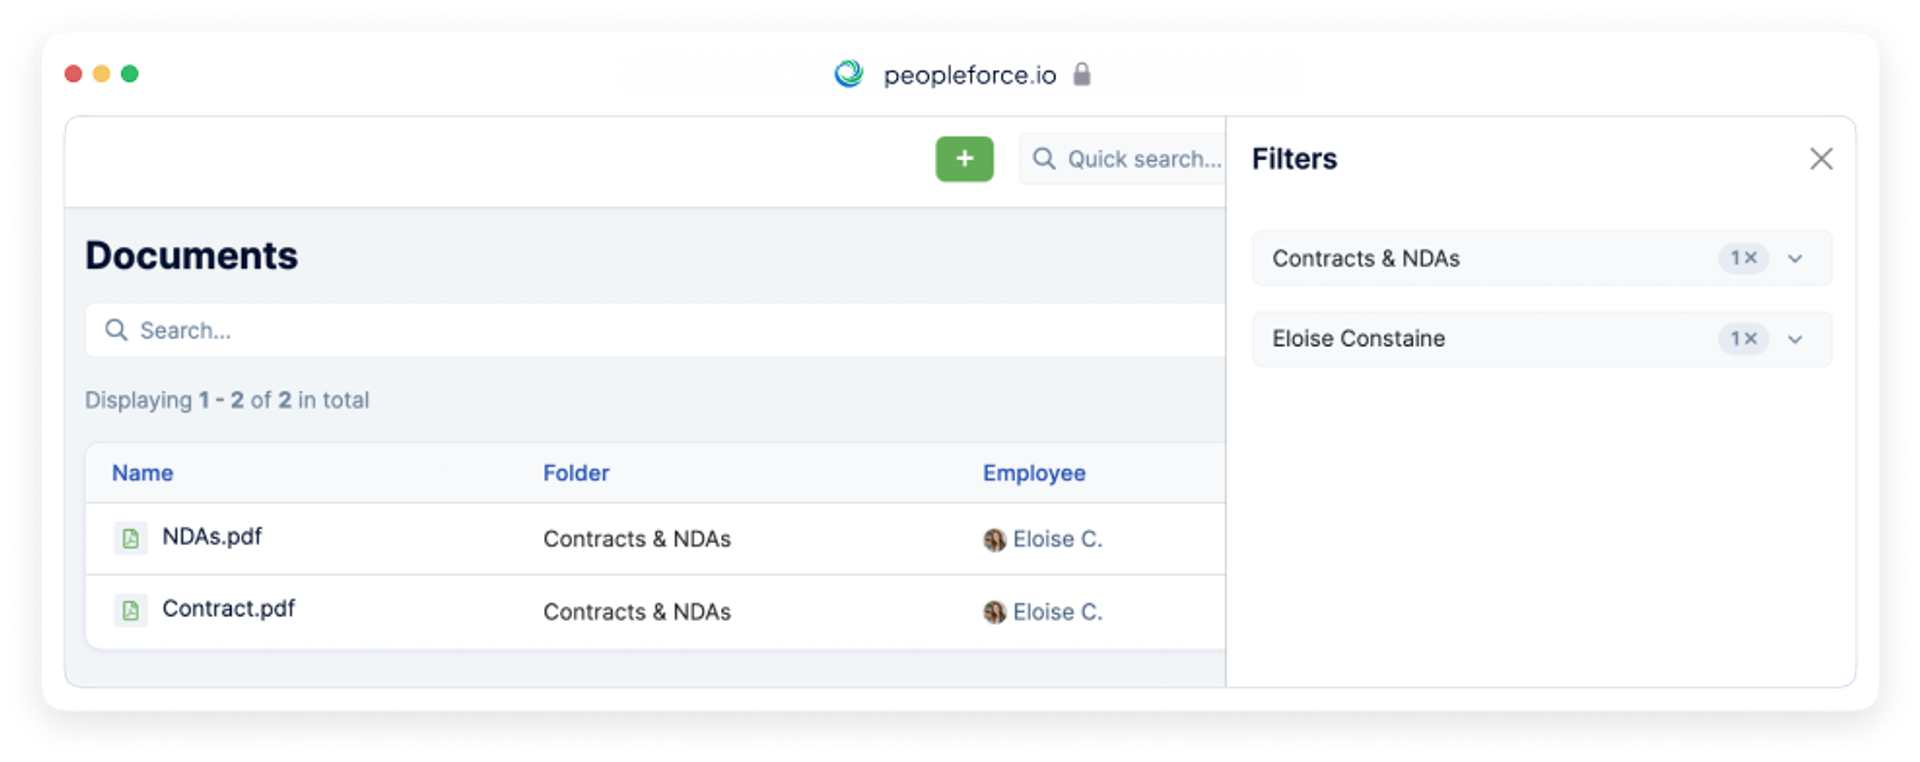
There is no more need to go into an employee's profile and search for a document. Now all documents at the company level can be found in one place in the Documents tab.
You can easily find the documents by using the flexible filters or just search by name in the search bar.
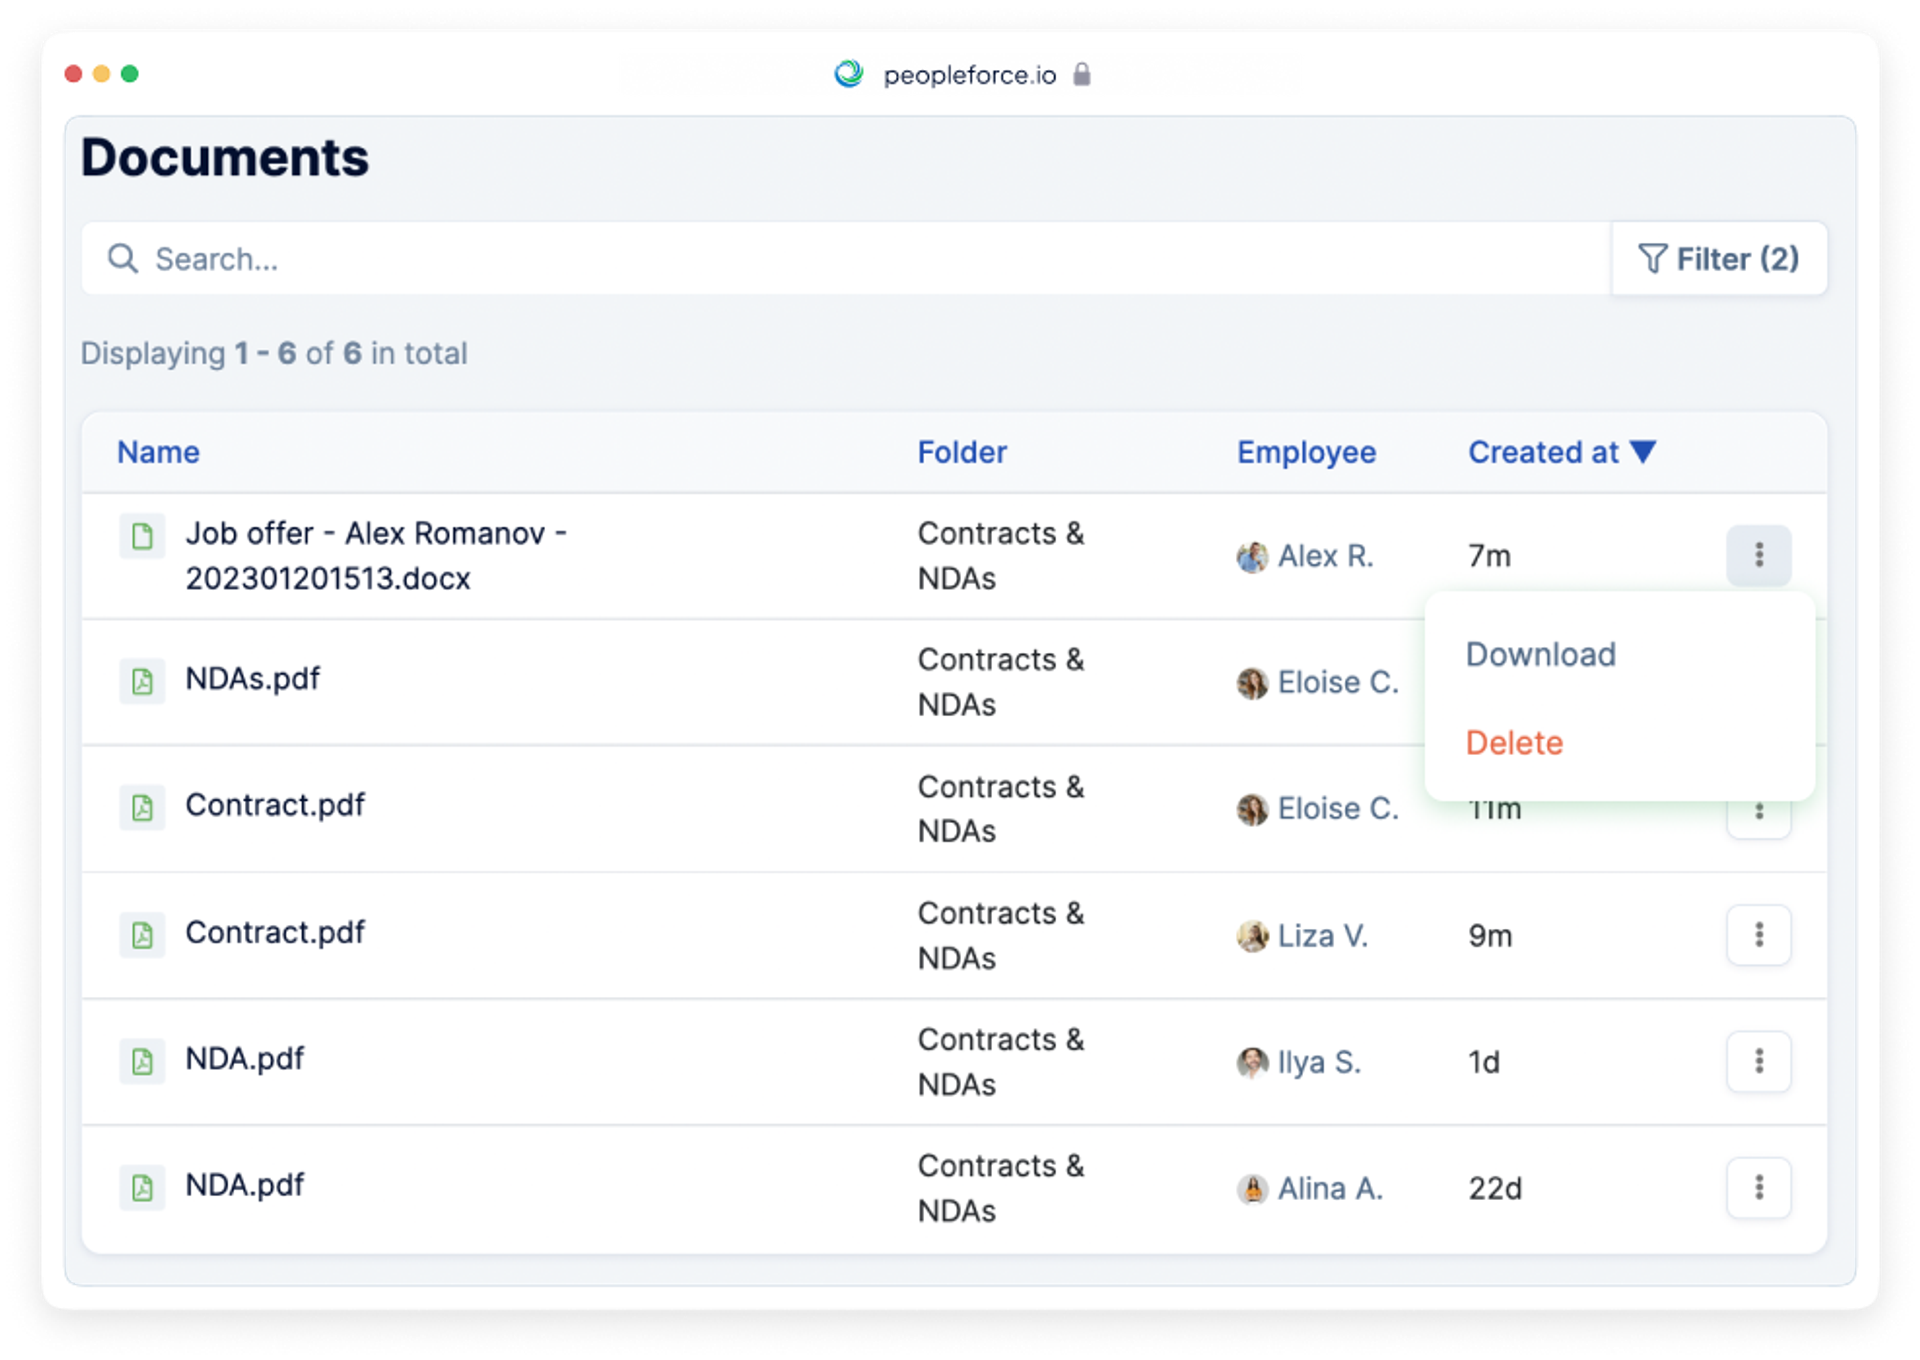
Download or delete the documents just in one click.
Bulk action for tags and assigning the candidates to another vacancy
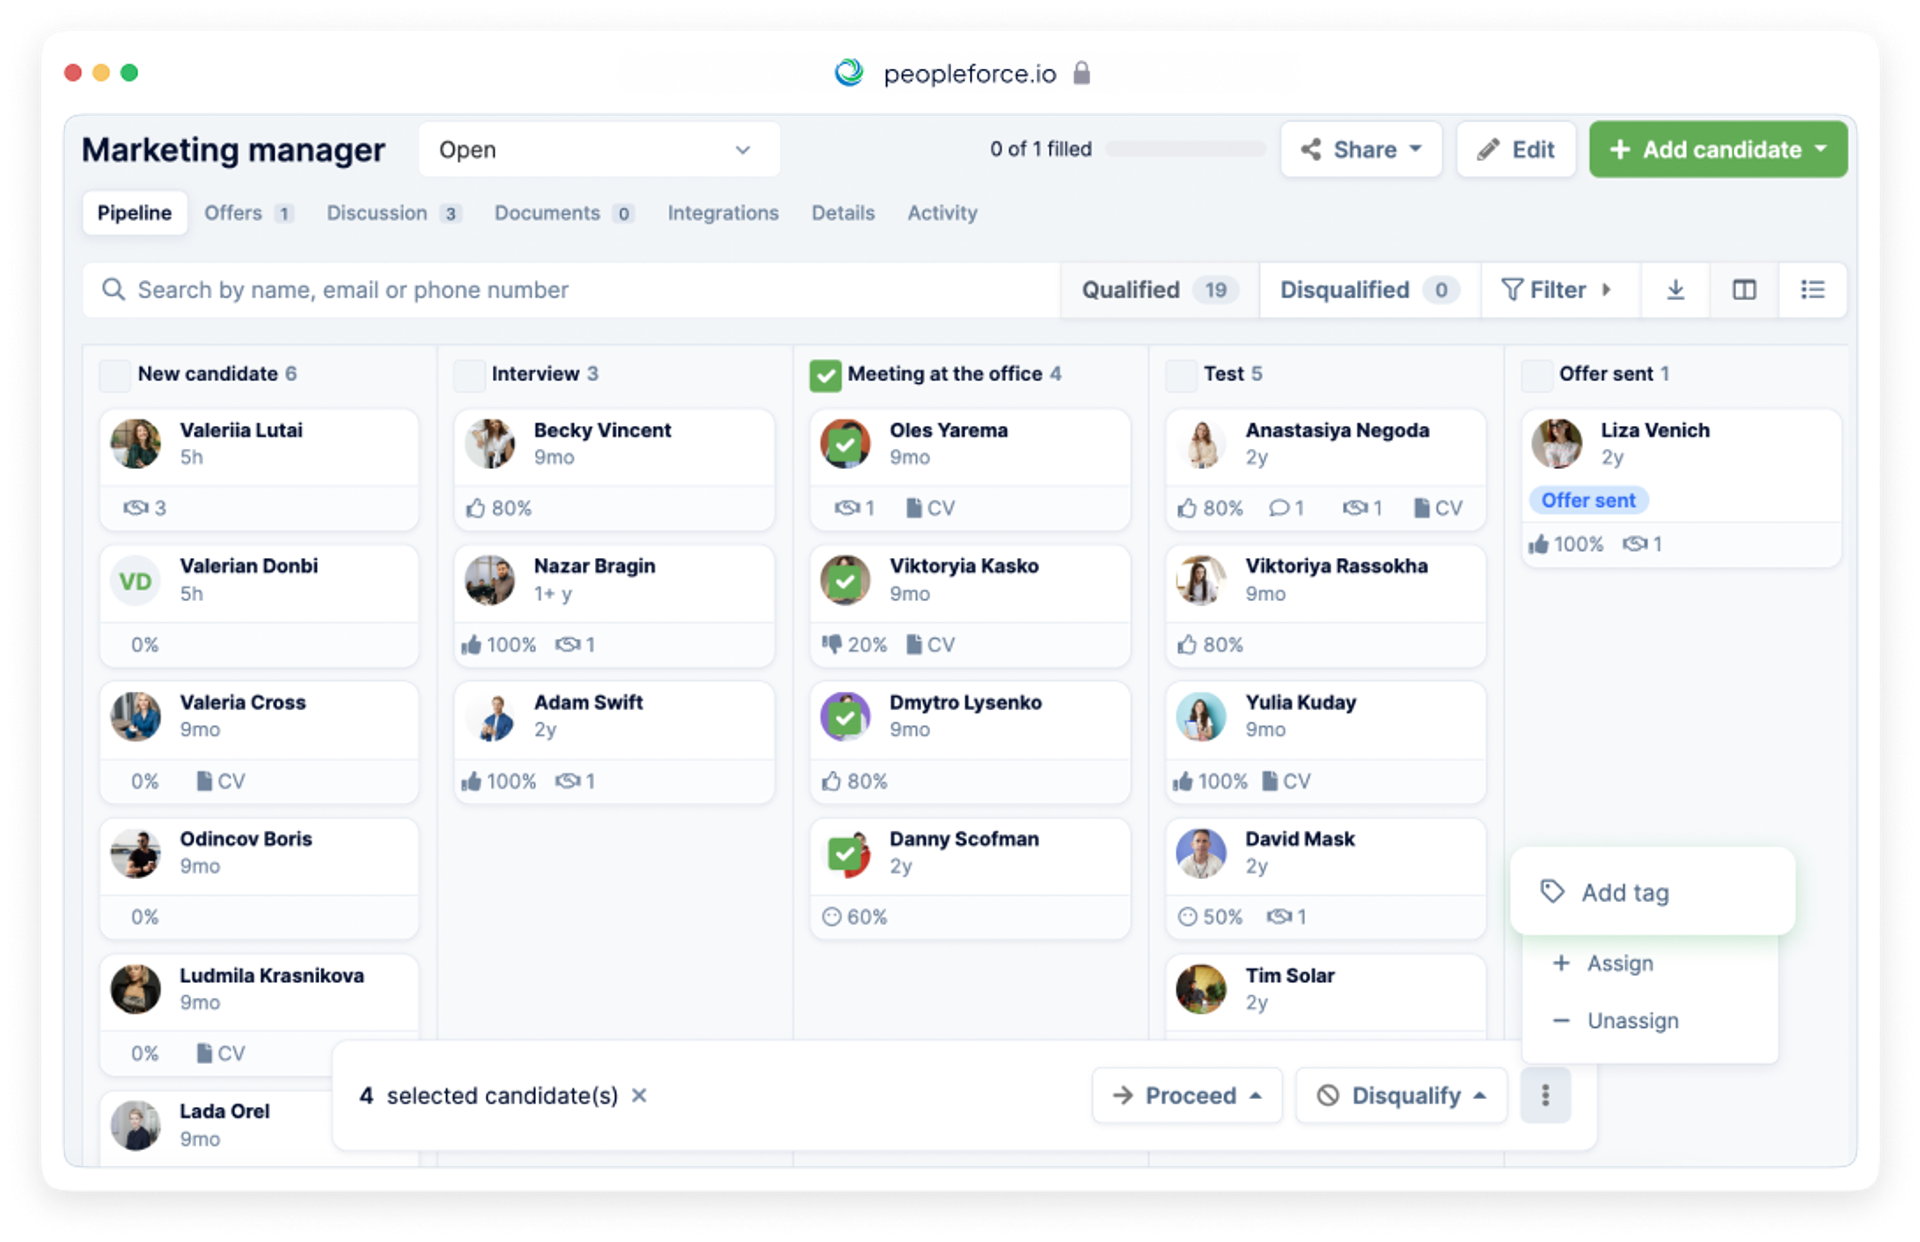
Now when you work with candidates for an open vacancy, you can select several candidates you want to combine under one tag. For example, tag the candidates with the highest scorecard rating or all interviewed candidates.
To perform this, choose the candidates and click three dots in the bottom of your screen.The option Add Tag will appear in the pop-up menu. Choose the tag you want to apply to these candidates.
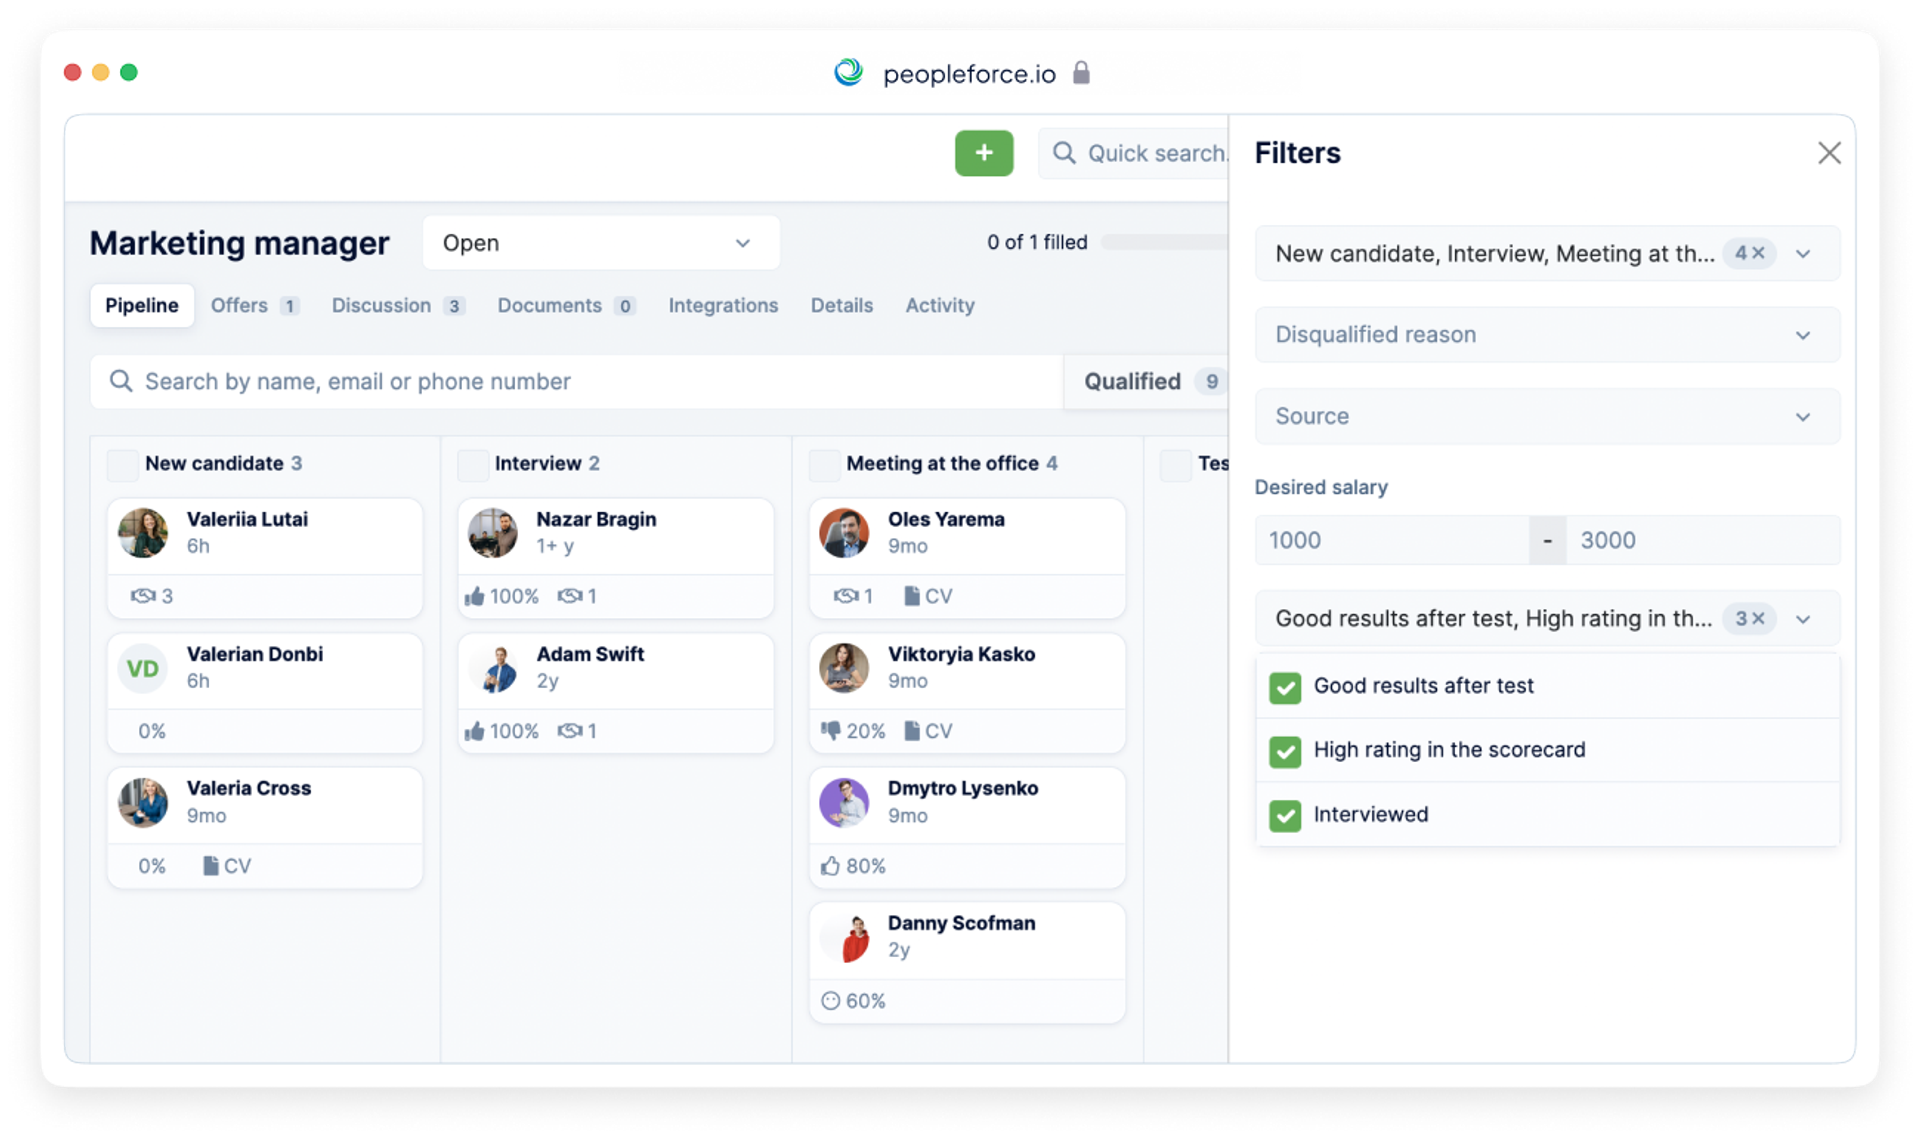
The filters make it simple to find tagged candidates.
Imagine a situation where you hire two marketing managers in one year. They performed well, and your company continues to grow and develop. You are faced with the need to open an additional position and hire a new employee. This is where our new option of assigning candidates we already know, and interviewed to a new position can come in handy.
Just open the previous vacancy, even if it is closed, and choose the candidates who were interviewed and scored high. Click the Assign button and relocate then to a new opened vacancy. The candidate will appear in the New Candidates Column. This allows you to contact the transferred candidates and verify their employment status.
Want to share your impressions of the month's updates? Write to us by email or send us a message via our social media sites and will be happy to receive your feedback.
You can also book a demo presentation where our manager will be happy to answer your questions.
Plan a trial period of the PeopleForce system, read our past updates in the blog, and follow the new releases in the PeopleForce Library.
Recent updates
A fresh feel for PeopleForce: UX updates you’ll notice
We’re rolling out a set of UX improvements designed to make PeopleForce feel lighter, calmer, and easier to use every day — for you and your employees.
Get ready for the EU Pay Transparency Directive with PeopleForce
Discover the key obligations of the Pay Transparency Directive and see how PeopleForce helps organisations prepare the structures, processes, and data needed to comply with the new requirements.
Fresh features to boost your performance reviews and goal-setting by the end of 2025
As the goal-setting and performance review season approaches, it’s the perfect time to ensure your processes are smooth, insightful, and motivating for every employee.
